How Long Will 30 kWh Battery Last My House?

Blog

How Long Will a 30 kWh Battery Power a Home in Europe?

by VatrerZachary on Dec 30 2024
A 30 kWh battery can provide a reliable source of energy for a home, but its duration depends on several factors, including the household's energy consumption patterns, the efficiency of the battery system, and the integration of solar panels. 
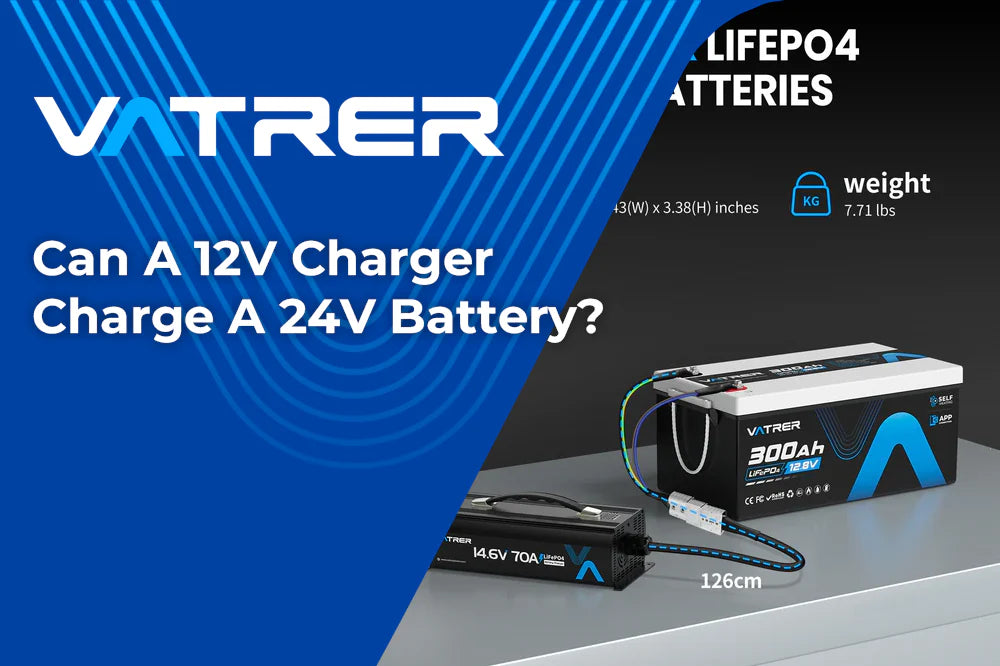
Can A 12V Charger Charge A 24V Battery?

Blog

Can a 12V Charger Charge a 24V Battery? Safe Charging Guide for European Users

by VatrerZachary on Dec 27 2024
No, a 12V charger cannot safely charge a 24V battery. The voltage of the charger needs to match or exceed the voltage of the battery being charged to ensure effective and safe charging. Using a charger with a lower voltage than the battery can lead to incomplete charging and potentially damage the battery.
Wiring a 24V Battery for an Electric Scooter

Blog

24V E-Scooter Battery Wiring: Safe Setup Guide

by VatrerZachary on Dec 27 2024
Introduction A 24V electric scooter battery system must be wired with care. Correct wiring supports smooth acceleration, protects the controller, reduces voltage drop, and helps prevent electrical faults. This is especially important for compact scooters, where the battery, wiring harness, controller, and motor are installed close together in a small frame. Across Europe, electric scooters may be used for private land, leisure, site mobility, or local transport depending on national and local rules. Whatever the riding environment, the electrical system should be assembled safely. This guide explains how to wire a 24V battery for an electric scooter using practical steps, clear polarity checks, and proper protection. Why Proper Wiring Is Essential An electric scooter can draw a surprising amount of current when starting, climbing, or accelerating. If the wiring is loose, reversed, too thin, or poorly insulated, the result may be weak performance, hot connectors, controller failure, battery imbalance, or a short circuit. Proper wiring gives the electrical system a stable path for current and makes later inspection much easier. Overview of a 24V Battery System A 24V scooter may use one ready-made 24V battery pack or two 12V batteries connected in series. In a two-battery system, the voltage of each battery is added together. Two 12V batteries in series provide 24V total, while the amp-hour capacity remains the same as one battery. The 24V output powers the controller, and the controller manages how much power is sent to the motor. The charger, controller, motor, fuse, wiring, and connectors should all be suitable for 24V operation and for the battery chemistry being used. Components Needed for a 24V Electric Scooter Battery System 24V Battery Pack or Two 12V Batteries The simplest option is a dedicated 24V battery pack with suitable built-in protection. If you are using two 12V batteries, both should be the same type, capacity, age, and state of charge. Do not mix lithium and lead-acid batteries in the same series circuit, and avoid pairing a new battery with an old one. 24V Scooter Controller The controller must match the battery voltage and the motor’s current requirement. It regulates acceleration, protects the motor from uncontrolled current delivery, and often connects to the throttle, brake cut-off, and power switch. 24V Electric Motor The motor should be rated for 24V. A motor designed for another voltage may run inefficiently, overheat, or place too much demand on the controller and battery. Tools, Cables, and Connectors Useful tools include a multimeter, insulated spanners, wire cutters, wire strippers, crimping tools, heat-shrink tubing, cable ties, and terminal covers. Use cables with a suitable current rating, and choose connectors that lock securely and resist vibration. For European and UK applications, use appropriately rated components and chargers suitable for the local mains supply and battery chemistry. Part Key Requirement Purpose Battery pack 24V output or two matched 12V batteries Provides the scooter’s main power Controller 24V rating and suitable current capacity Controls power delivery to the motor Fuse or breaker Correct current rating and close to battery positive Limits damage during a short circuit Cables Correct cross-section for current draw Reduces heat and voltage loss Multimeter DC voltage and polarity testing Confirms the wiring before power-on Understanding Battery Wiring Series and Parallel Connections Series wiring is used when you need to increase voltage. To make 24V from two 12V batteries, connect the positive terminal of one battery to the negative terminal of the other battery. The two remaining outer terminals become the 24V positive and negative output. Parallel wiring is used for increasing capacity while keeping the same voltage. Two 12V batteries wired in parallel remain a 12V system, so this method will not power a 24V scooter controller correctly. Positive and Negative Terminals Battery terminals are normally marked with “+” and “-”. Red is commonly used for positive wiring and black for negative wiring, but colours should never be treated as final proof. Repairs, replacements, and previous modifications can change a harness. Always check polarity with a multimeter before connecting the controller. Step-by-Step Process for Wiring a 24V Scooter Battery Prepare the Scooter and Workspace Switch off the scooter and disconnect the charger. Remove the battery cover or access panel carefully. Work in a dry, ventilated area with enough light. Keep metal jewellery, loose screws, and tools away from open terminals. Check the battery tray for moisture, corrosion, cracked insulation, or sharp edges. Connect Two 12V Batteries in Series Identify the terminals: Find the positive and negative terminals on each 12V battery. Install the series cable: Connect the negative terminal of the first battery to the positive terminal of the second battery with a short cable of suitable size. Use the free terminals as output: The unused positive terminal on one battery and the unused negative terminal on the other battery form the 24V output. Secure all connections: Tighten the terminals firmly, but do not overtighten soft battery posts. Insulate exposed conductors: Use terminal boots, heat-shrink tubing, or protective covers to reduce accidental contact. Confirm voltage: Measure across the two free output terminals with a multimeter before connecting the controller. Wire the Battery Pack to the Controller Protect the positive output: Fit a fuse or circuit breaker as close as practical to the battery’s positive output terminal. Connect positive to the controller: Run the protected positive lead to the controller’s positive power input. Connect negative to the controller: Connect the battery pack’s negative output to the controller’s negative power input. Route cables safely: Keep cables away from the steering column, brake mechanism, tyres, folding joints, and sharp frame edges. Secure the harness: Use clips or cable ties so vibration cannot pull on terminals or connectors. Connect the Motor to the Controller Identify the motor wiring: A brushed motor usually has two larger wires, while a brushless motor may have three phase wires plus smaller sensor wires. Follow the wiring diagram: Match the motor wires to the controller outputs according to the scooter manufacturer’s layout. Check all plugs: Make sure connectors are fully seated and not strained. Test gently: Raise the drive wheel before applying light throttle for the first time. Safety Precautions Before Powering the Scooter Safe Battery Handling Wear eye protection and insulated gloves when working close to terminals. Never bridge battery terminals with a tool, wire, or metal part. Do not use a battery that is swollen, leaking, cracked, or unusually hot. Use a charger made for the battery’s voltage and chemistry. For lithium packs, use a suitable battery management system and follow the charging temperature limits provided by the battery manufacturer. Preventing Short Circuits Short circuits can cause sparks, melted wiring, damaged electronics, or battery failure. Keep exposed positive terminals covered whenever possible. Route the main positive cable through a fuse or breaker, and check that it cannot touch the scooter frame or other conductive parts. Moisture and Outdoor Use Rain, road spray, and condensation can affect scooter wiring. Use well-insulated connectors, keep the battery compartment clean, and dry the scooter before charging if it has been exposed to wet conditions. Never charge a battery in standing water or in a visibly damp charging port. Testing the 24V Battery Setup Check Voltage and Polarity Set the multimeter to DC voltage. Place the red probe on the intended positive output and the black probe on the intended negative output. Confirm that the reading is positive and appropriate for the battery state of charge. If the meter shows a negative value, stop and correct the polarity before connecting the controller. Functional Test Lift the drive wheel clear of the ground. Switch the scooter on and apply a small amount of throttle. Listen for smooth motor operation without grinding, clicking, or pulsing. Check brake cut-off operation before riding. After the first short test, inspect wires and connectors for heat or looseness. Troubleshooting Common Wiring Problems Issue Likely Reason Action No power at the scooter Blown fuse, loose terminal, wrong polarity, discharged battery Check pack voltage, fuse, and main leads Controller clicks but motor does not move Motor wiring fault, brake cut-off active, throttle signal issue Inspect motor leads, brake switch, and throttle connector Motor runs backwards Motor polarity or phase wiring issue Refer to the motor and controller wiring diagram Wires become hot Undersized cable, loose connection, excessive current draw Stop testing and inspect cable size and terminals Short range Low battery capacity, weak battery, mechanical drag, cold weather Test battery health and inspect brakes and tyres Maintenance Tips for a Reliable 24V E-Scooter Battery Inspect wiring after vibration, impacts, or battery replacement. Keep terminals clean, dry, and covered. Use only the correct charger for the battery chemistry. Replace damaged connectors instead of reusing overheated parts. Check local regulations before using an electric scooter on public roads, pavements, cycle lanes, or shared paths. Conclusion Wiring a 24V battery for an electric scooter is a manageable project when each step is done carefully. Use matching batteries, connect them in series, protect the positive output with a fuse or breaker, verify polarity with a multimeter, and test the scooter with the drive wheel raised before riding. A tidy, well-protected 24V wiring setup improves safety, reliability, and battery performance for everyday scooter use.
How Long To Charge 12V Deep Cycle Battery At 10 Amps?

Blog

12V Deep Cycle Battery Charge Time at 10 Amps: Practical Guide

by Larson Emma on Dec 26 2024
Charging a 12V deep cycle battery at 10 amps is a common setup for motorhomes, campervans, caravans, boats, trolling motors, solar storage, off-grid cabins, garden buildings, and backup power systems. A 10A charger is practical for many 12V batteries, but charge time depends on battery capacity, battery chemistry, state of charge, charger efficiency, temperature, and the condition of the battery. As a general guide, a fully discharged 12V 100Ah deep cycle battery takes around 11 to 13 hours to charge at 10 amps. A 50Ah battery may take around 5 to 6.5 hours, while a 200Ah battery may take 22 to 25 hours or more. LiFePO4 lithium batteries usually charge more efficiently than lead-acid batteries, but they still need a charger with the correct voltage profile. This guide explains how to estimate charging time, how lithium and lead-acid batteries differ, what affects charging speed, and how to charge safely in European motorhome, marine, solar, and off-grid applications. How Long Does It Take to Charge a 12V Deep Cycle Battery at 10 Amps? The charging time depends on how many amp-hours need to be replaced. A 10A charger can deliver up to 10 amps of charging current, but not every amp-hour from the charger becomes stored battery capacity. Some energy is lost as heat, and the final stage of charging may slow down as the battery approaches full charge. Basic formula: Charging Time = Amp-Hours to Replace ÷ Charger Amps ÷ Charging Efficiency For example, if a 12V 100Ah LiFePO4 battery is fully discharged and charging efficiency is around 90%, the estimated charging time is: 100Ah ÷ 10A ÷ 0.90 = about 11.1 hours If the same battery is only 50% discharged, you need to replace around 50Ah: 50Ah ÷ 10A ÷ 0.90 = about 5.6 hours For lead-acid batteries, charging often takes longer because they are less efficient and spend more time in the absorption stage near full charge. A fully discharged 100Ah lead-acid battery at 10 amps may take about 12.5 hours by formula, and sometimes longer in real conditions. Quick Charging Time Estimates at 10 Amps The table below gives practical estimates for fully discharged 12V deep cycle batteries. Actual time may vary depending on battery age, temperature, charger design, cable condition, and whether the charger reduces current near the end of charging. Battery Capacity Estimated Lead-Acid Time at 10A Estimated LiFePO4 Time at 10A Typical Use 20Ah About 2.5 hours About 2.2 hours Small electronics, lighting, compact backup packs 50Ah About 6.3 hours About 5.6 hours Small boats, kayaks, camping lights, portable systems 100Ah About 12.5 hours About 11.1 hours Motorhome leisure battery, caravan, trolling motor, solar storage 200Ah About 25 hours About 22.2 hours Motorhome off-grid use, boat house bank, cabin power 300Ah About 37.5 hours About 33.3 hours Larger solar, rural property, or off-grid system 400Ah About 50 hours About 44.4 hours Large motorhome, marine, or backup energy bank Charging Time by State of Charge A battery is not always completely empty when you start charging. If you know the approximate state of charge, you can estimate the remaining charging time more accurately. Battery Example Starting State of Charge Capacity to Replace Approximate Time at 10A 100Ah LiFePO4 20% 80Ah About 8.9 hours 100Ah LiFePO4 50% 50Ah About 5.6 hours 100Ah LiFePO4 80% 20Ah About 2.2 hours 100Ah Lead-Acid 50% 50Ah About 6.3 hours, often longer near full Lead-acid batteries often charge quickly at first, then slow down during the absorption stage. Lithium batteries normally charge more consistently until they approach full charge, where the charger and BMS help taper or stop charging. Understanding the 12V Deep Cycle Battery Charging Process A deep cycle battery is designed to provide steady energy over time. It is different from a starter battery, which is built to deliver a short, high-current burst for starting an engine. Deep cycle batteries are widely used in motorhomes, campervans, caravans, boats, solar systems, trolling motors, mobility equipment, garden offices, and emergency backup systems. Bulk Stage During the bulk stage, the charger delivers most of its available current. A 10A charger may provide close to 10 amps during this stage. This is where most of the battery capacity is restored. Absorption Stage During absorption, the charger holds a controlled voltage while current gradually decreases. This stage is especially important for lead-acid batteries and can add noticeable time near the end of charging. Float or Maintenance Stage Lead-acid chargers often enter float mode after the battery is full to maintain charge. Lithium batteries generally do not need continuous float charging in the same way. A lithium-compatible charger should follow the battery manufacturer’s recommended charging profile. Lead-Acid vs LiFePO4 Lithium Charging at 10 Amps Lead-acid and lithium batteries charge differently. Using the wrong charger can lead to undercharging, overcharging, overheating, reduced capacity, or a shortened service life. Feature Lead-Acid Deep Cycle Battery LiFePO4 Lithium Deep Cycle Battery Charging Efficiency Often around 70% to 85% Often around 85% to 95% Charging Speed Slower, especially near full Faster and more consistent with the correct charger Maintenance Flooded types may need water checks and terminal cleaning Low maintenance with BMS protection Depth of Discharge Best kept above about 50% where possible Can usually use more capacity, depending on manufacturer limits Cold Charging Reduced performance in cold conditions Should not be charged below rated temperature unless protected or heated Best Charger Type Flooded, AGM, or gel-compatible lead-acid charger LiFePO4-compatible charger Key Factors That Affect Charging Time 1. Battery Capacity Battery capacity is measured in amp-hours, or Ah. A 100Ah battery stores more energy than a 50Ah battery, so it takes longer to charge at the same current. A 50Ah battery charges much faster than a 200Ah battery. A 100Ah battery is common for motorhomes, boats, trolling motors, and compact solar storage. Large 200Ah to 400Ah battery banks may need a higher-amp charger for practical recharge times. 2. Starting State of Charge A battery at 50% charge needs roughly half the energy of a fully discharged battery. This is why a partially used leisure battery may recharge in one evening, while a deeply discharged house bank may take much longer. 3. Charger Output A 10A charger is suitable for many small and medium 12V batteries, but it can be slow for large battery banks. A 20A charger may reduce charging time significantly if the battery is rated to accept that current. Always check the battery’s recommended charging current before using a larger charger. 4. Charging Efficiency No charging process is 100% efficient. Lead-acid batteries lose more energy as heat and chemical loss, while lithium batteries are usually more efficient. This is why two batteries with the same amp-hour rating may not finish charging at exactly the same time. 5. Battery Age and Condition Older batteries may take longer to charge and may not hold full capacity. Sulphation, worn plates, low electrolyte, cell imbalance, or high internal resistance can all increase charging time and reduce usable energy. 6. Temperature Temperature has a major effect on charging. Cold conditions can slow charging and reduce available capacity, while excessive heat can stress the battery and charger. The best charging environment is dry, ventilated, and moderate in temperature. Cold sheds, garages, and marina storage can slow charging in winter. Hot motorhome lockers or boat compartments can shorten battery life. LiFePO4 batteries should not be charged below their rated charging temperature unless they include low-temperature protection or self-heating. Lead-acid batteries should not be stored deeply discharged in freezing conditions. How to Calculate Charging Time for Your Battery Use this formula for a practical estimate: Charging Time = Battery Capacity Used ÷ Charger Amps ÷ Efficiency Example 1: 100Ah Lead-Acid Battery from Empty 100Ah ÷ 10A ÷ 0.80 = 12.5 hours Example 2: 100Ah LiFePO4 Battery from Empty 100Ah ÷ 10A ÷ 0.90 = 11.1 hours Example 3: 100Ah LiFePO4 Battery from 50% 50Ah ÷ 10A ÷ 0.90 = 5.6 hours Example 4: 200Ah LiFePO4 Battery from 50% 100Ah ÷ 10A ÷ 0.90 = 11.1 hours These calculations are useful for planning, but real-world charging may take longer if the battery is cold, older, heavily discharged, or if the charger reduces current near full charge. Is a 10A Charger Enough for a 12V Deep Cycle Battery? A 10A charger is a good match for many 12V deep cycle batteries, especially batteries in the 50Ah to 100Ah range. It is commonly used for leisure batteries, small boats, fishing batteries, portable power systems, and compact solar setups. Battery Size Is a 10A Charger Practical? Notes 20Ah to 50Ah Yes Charges relatively quickly; confirm maximum charge current 100Ah Yes Good general-purpose match for overnight charging 200Ah Usable but slow May take a full day from low charge 300Ah to 400Ah Usually too slow for regular deep cycling Consider a higher-amp charger if battery specifications allow Can You Charge Faster Than 10 Amps? Yes, but only if the battery is designed to accept a higher charging current. Many LiFePO4 batteries can accept higher current than lead-acid batteries, but every battery has a maximum charging current specified by the manufacturer. When a Higher-Amp Charger Makes Sense You have a larger battery bank, such as 200Ah or more. You need faster turnaround between trips, sailing days, or off-grid use. Your battery specifications allow 20A, 30A, or higher charging. Your wiring, fuses, and connectors are rated for the increased current. Your charger matches the battery chemistry. When to Stay with 10 Amps Your battery is small and has a low recommended charge current. You charge overnight and do not need extra speed. Your lead-acid battery manufacturer recommends slower charging. Your wiring or connectors are not rated for higher current. Practical Charging Tips for Motorhome, Marine and Solar Users For Motorhomes, Campervans and Caravans Recharge after each trip instead of leaving the battery deeply discharged. Use a LiFePO4-compatible charger if your leisure battery is lithium. Check parasitic loads such as alarms, trackers, control panels, fridges, and USB sockets. Do not rely on an old converter charger unless it supports your battery chemistry. For seasonal storage, follow the battery manufacturer’s state-of-charge recommendation. For Boats and Trolling Motors Recharge after boating or fishing rather than storing the battery low. Charge in a dry, ventilated area away from standing water. Use marine-grade wiring and secure connections. Inspect terminals for corrosion, especially in damp or coastal storage. Confirm charger compatibility with flooded, AGM, gel, or lithium batteries. For Solar and Off-Grid Systems Use a charge controller that matches your battery chemistry. Do not mix old and new batteries or different chemistries in the same bank. Size the charger or solar array to match daily energy demand. Monitor voltage, state of charge, battery temperature, and charge current. Use suitable fusing and cable size for all charging equipment. Safety and Maintenance for 12V Deep Cycle Batteries Avoid Overcharging Overcharging can shorten battery life and may cause heat, swelling, water loss, or internal damage. Use a smart charger with automatic shut-off or a suitable maintenance mode. Do not leave a non-smart charger connected unattended for long periods. Use the Correct Charger Profile A LiFePO4 battery should be charged with a lithium-compatible charger. Flooded lead-acid, AGM, and gel batteries each require suitable voltage profiles. The wrong charger can undercharge, overcharge, or damage the battery. Monitor Charging Use a voltmeter, battery monitor, charger display, or battery app if available. A fully charged resting voltage depends on battery chemistry. A 12V lead-acid battery often rests around 12.6V to 12.8V when full, while a 12V LiFePO4 battery often rests around 13.2V to 13.6V. Watch for Warning Signs Battery case feels unusually hot Battery is swollen, cracked, or leaking Charger smells burnt or makes unusual noise Charging cables become hot BMS or charger shows a fault Charging takes much longer than usual If any of these signs appear, stop charging and inspect the system. Have the battery or charger checked by a qualified technician if the cause is unclear. European Seasonal Storage Tips Deep cycle batteries often sit unused through winter or between trips. Poor storage can shorten battery life, especially in damp coastal sheds, unheated garages, marina storage, outdoor lockers, and rural outbuildings. Charge lead-acid batteries fully before storage unless the manufacturer says otherwise. Store LiFePO4 batteries at the manufacturer’s recommended state of charge. Disconnect parasitic loads during long storage. Keep batteries in a dry, protected location when possible. Do not store lead-acid batteries deeply discharged in freezing conditions. Do not charge LiFePO4 batteries below their rated charging temperature unless protected or heated. Check state of charge periodically during long storage. Inspect terminals and cables before putting the battery back into service. Common Charging Problems and Fixes Problem Possible Cause What to Do Battery takes much longer than expected Cold temperature, weak charger, old battery, low starting SOC Charge in moderate temperature and test charger output Charger stops too early Wrong charger profile, BMS protection, poor connection Check charger compatibility and cable connections Battery will not reach full charge Battery degradation, imbalance, incorrect charger voltage Test battery capacity and confirm charger settings Cables get hot Loose connection, undersized cable, high resistance Stop charging and inspect wiring Battery voltage drops quickly after charging Weak or aged battery Perform a load test or capacity test Lithium battery will not charge in cold weather Low-temperature BMS protection Warm battery to approved temperature or use a heated battery model FAQs Can I use a 10A lithium charger for a lead-acid battery? Only if the charger specifically supports lead-acid charging modes. A lithium-only charger may not provide the correct absorption or float profile for flooded, AGM, or gel batteries. Always confirm charger compatibility before use. How do I know when my 12V deep cycle battery is fully charged? Use a charger display, battery monitor, Bluetooth app, or voltmeter. A smart charger may show full charge or switch to maintenance mode. Resting voltage can help, but it must be interpreted based on battery chemistry. Is it safe to leave a 12V deep cycle battery charging overnight at 10 amps? It can be safe if you use a smart charger matched to the battery type with automatic shut-off or the correct maintenance mode. Avoid leaving non-smart chargers unattended. Make sure the charging area is dry, ventilated, and away from flammable materials. Why is my battery taking longer than the estimate? Cold temperatures, an older battery, low starting state of charge, charger inefficiency, absorption-stage tapering, or incorrect charger settings can all extend charging time. If charge time increases suddenly, inspect both the charger and battery. Can I charge a 12V deep cycle battery faster than 10 amps? Yes, if the battery manufacturer allows a higher charge current. Many LiFePO4 batteries can accept higher current than lead-acid batteries, but the charger, wiring, connectors, and fuses must all be rated correctly. What is the best charging temperature? A moderate, dry, ventilated environment is best. Avoid charging in extreme heat or freezing conditions. LiFePO4 batteries should not be charged below their rated charging temperature unless the battery includes low-temperature protection or heating. Should I fully discharge a deep cycle battery before charging? No. Regular full discharges can shorten battery life, especially for lead-acid batteries. Recharge before the battery is deeply depleted. Lithium batteries tolerate deeper discharge better, but partial charging is still often easier on the system. Conclusion Charging a 12V deep cycle battery at 10 amps can take a few hours for small batteries and overnight or longer for larger ones. A fully discharged 100Ah battery typically takes about 11 to 13 hours, depending on whether it is LiFePO4 lithium or lead-acid. Larger 200Ah to 400Ah battery banks can take a full day or more with a 10A charger. For the best results, calculate charging time based on amp-hours used, charger current, and efficiency. Use a charger matched to your battery chemistry, charge in a dry and ventilated area, monitor temperature, and avoid deep discharge whenever possible. For European motorhomes, campervans, caravans, boats, solar systems, off-grid cabins, and backup power setups, a 10A charger can be a dependable option for many 12V deep cycle batteries. For larger banks or faster turnaround, choose a higher-amp charger only if the battery specifications, wiring, and safety protections allow it.
Golf Cart Titles: A Comprehensive Analysis

Blog

Do Golf Carts Need Registration Papers? Europe Road-Use Guide

by VatrerZachary on Dec 25 2024
In Europe, golf carts usually do not have a “title” in the American sense. The paperwork depends on the country and how the cart is used. A golf buggy used only on a golf course, private estate, resort, holiday park, marina, farm, or private site often does not need full road registration. But if you want to use it on public roads, the situation changes. For public-road use, the important documents are usually a registration certificate, proof of insurance, number plates, vehicle approval papers, and sometimes a roadworthiness or inspection record. In the UK, owners often talk about a V5C logbook. In France, it may be a certificat d’immatriculation, often still called a carte grise. Other European countries use their own registration documents and approval systems. Do Golf Carts Have Titles in Europe? Most European countries do not use the word “title” for vehicles in the same way it is used in the United States. Instead, road vehicles are linked to registration certificates, number plates, insurance records, and type approval documents. So if you are buying a golf cart or golf buggy in Europe, the answer depends on the type of use: Private land only: a formal road registration document may not be required. Golf course use: ownership is usually proven by invoice, bill of sale, serial number, or fleet records. Holiday park or resort use: site rules and insurance may matter more than road registration. Public road use: registration, insurance, plates, approval, and driver requirements may apply. Quadricycle classification: the vehicle may need to meet national or EU approval rules. The key point is simple: if the buggy stays on private land, paperwork is usually lighter. If it goes on the road, it must be treated much more like a regulated vehicle. Golf Cart, Golf Buggy, or Quadricycle? Terminology matters in Europe. A vehicle that looks like a golf cart may be described in different ways depending on the country and category. You may see terms such as golf buggy, electric utility vehicle, light quadricycle, heavy quadricycle, off-road utility vehicle, or low-speed electric vehicle. For road use, many small four-wheeled vehicles fall into quadricycle-style categories, depending on weight, power, speed, and construction. If the vehicle has the correct approval, it may be registered for road use under the relevant national system. If it does not, it may only be suitable for private land. This is why a road-looking buggy is not automatically road legal. Lights, mirrors, seat belts, and indicators help, but they do not replace proper approval, registration, and insurance. When Does a Golf Cart Need Registration? A golf cart or buggy is more likely to need registration when it is used on public roads or sold as a road-legal vehicle. The exact process depends on the country, but common requirements include: Vehicle registration certificate Proof of ownership or purchase invoice Certificate of conformity or approval document VIN or manufacturer identification number Insurance certificate Number plates Lighting and signalling equipment Roadworthiness test where required Driver licence or AM category entitlement where required In the UK, a light four-wheeled vehicle may need the correct vehicle approval route before it can be registered. In France, small road-going quadricycles such as voiture sans permis vehicles must be registered for road use and display a rear number plate. Across the EU, type approval and national registration rules are central to whether a small vehicle can legally be used on public roads. When a Golf Cart Usually Does Not Need Road Registration A golf cart used only on private land is usually handled differently from a road vehicle. This is common for: Golf clubs Private estates Holiday parks Resorts and hotels Farms and vineyards Marinas Industrial campuses Event venues Private residential sites Even so, “private land” does not mean “no rules.” The site owner may require insurance, safety equipment, driver age limits, speed limits, maintenance records, and operating rules. If the route crosses a public road, even briefly, additional rules may apply. What Paperwork Should Buyers Ask For? If you are buying a used golf cart in Europe, ask for documents that prove both ownership and suitability for your intended use. A buggy that is perfect for a golf course may be impossible to register for road use later. Document Why It Matters Purchase invoice or bill of sale Shows who sold the vehicle, who bought it, and when the sale happened. Serial number or VIN Identifies the buggy and helps match it to records. Certificate of conformity Important if the vehicle is approved for road use. Registration certificate Needed if the buggy is already registered for public roads. Insurance documents Required for road use and often useful for commercial or site use. Inspection or roadworthiness record May be required depending on country and vehicle class. Battery and charger records Useful for electric carts, especially lithium battery upgrades. Import documents Important for vehicles brought in from outside the EU or UK. Country Terms You May See The same basic idea appears under different names across Europe. When checking documents, look for the local equivalent rather than the American word “title.” Market Common Term What It Usually Means United Kingdom V5C logbook Vehicle registration certificate, not proof of ownership by itself. France Certificat d’immatriculation / carte grise Registration document for a road vehicle. Germany Zulassungsbescheinigung Vehicle registration certificate. Spain Permiso de circulación Vehicle circulation or registration document. Italy Carta di circolazione Registration and circulation document. These documents do not all work exactly the same way, but they serve the same general purpose: they connect a road vehicle to registration records, technical details, and legal use. Can You Make a Golf Cart Road Legal in Europe? Sometimes, but it is not as simple as adding lights. Many golf carts are built for private sites, not public roads. To become road legal, the vehicle may need to fit an approved vehicle category and meet the technical standards for that category. Possible requirements may include: Approved lighting and indicators Mirrors Horn Braking system Seat belts where required Windscreen and wiper where required Tyres suitable for road use VIN or approved identification number Speed and power limits for the vehicle class Certificate of conformity or individual approval Insurance and registration Before buying a cart with the plan to “make it road legal later,” speak with the local vehicle registration authority or an approved inspection centre. Some vehicles can be approved. Others cannot be registered without major changes, and some may never qualify. What About Holiday Parks, Campsites, and Private Communities? Golf buggies are common in holiday parks, campsites, large resorts, and private communities. In these places, the rules are often set by the site operator, especially if the roads are private. However, you should still ask practical questions: Are buggies allowed on the site? Is there a minimum driver age? Is insurance required? Are passengers allowed? Are there night-time driving rules? Are lights, reflectors, or warning devices required? Can the buggy cross or use any public road? If the buggy touches a public road, even for a short crossing, road traffic rules may apply. That is where many owners get caught out. Buying a Used Golf Cart Without Registration Papers A used golf cart without road registration papers can still be a good purchase if you only need it for private land. But it is risky if the seller advertises it as road legal without documents. Before you buy, check: The seller can provide a proper invoice or bill of sale. The serial number or VIN is visible and matches the paperwork. The vehicle has not been stolen or written off. The battery, charger, and controller are in good condition. The cart is suitable for your site, terrain, and local rules. The seller is honest about whether it is private-use only or road registered. Any road-legal claim is supported by actual registration and approval documents. If a buggy has no registration certificate, no certificate of conformity, and no approval documents, assume it is for private land only until proven otherwise. Golf Cart Paperwork Checklist for Europe Your Planned Use Documents to Prioritise Golf course only Invoice, serial number, maintenance records, battery records. Private estate or farm Bill of sale, serial number, insurance check, site permission. Holiday park or resort Site approval, liability coverage, driver rules, safety equipment. Public road use Registration certificate, insurance, approval documents, plates, licence requirements. Imported buggy Customs documents, VAT record, certificate of conformity, approval route. Road-legal quadricycle Registration, number plate, insurance, technical inspection where required. Conclusion: Does a Golf Cart Need a Title in Europe? In Europe, a golf cart usually does not need a “title” because that is not the normal vehicle ownership term. For private use, a purchase invoice, bill of sale, and serial number may be enough. For public-road use, you need to look for registration, insurance, number plates, approval documents, and country-specific compliance. Bottom line: if the buggy stays on private land, keep clear proof of ownership and follow site rules. If it will be used on public roads, treat it as a regulated vehicle and confirm the exact requirements before you buy, modify, import, or insure it. A low price is not a bargain if the buggy cannot be used where you need it. Good paperwork is just as important as battery condition, tyres, brakes, and range.
How To Plug Christmas Lights Into Golf Cart?

Blog

How to Fit Christmas Lights to a Golf Buggy Safely

by VatrerZachary on Dec 24 2024
Decorating your golf cart with Christmas lights can be a fun and rewarding project. By following the steps outlined in this guide, you can create a festive and safe display that will bring joy to your community. Enjoy the process and the holiday spirit that comes with it!
Charging Requirements for LiFePO4 Batteries

Blog

LiFePO4 Battery Charging: Voltage, Chargers and Safety Guide

by VatrerZachary on Dec 23 2024
1
Introduction LiFePO4 batteries are widely used across Europe in motorhomes, caravans, marine systems, solar storage, mobility equipment, golf trolleys, off-grid cabins, and backup power systems. They are valued for their stable chemistry, long cycle life, lighter weight, and ability to deliver consistent power compared with many traditional lead-acid batteries. To get the best performance from a LiFePO4 battery, the charging method must match the battery chemistry. Correct charging helps protect the cells, supports full usable capacity, and extends battery lifespan. Incorrect charging can lead to undercharging, BMS shutdowns, reduced capacity, or long-term damage. What Is a LiFePO4 Battery? LiFePO4 stands for lithium iron phosphate. This type of lithium battery uses a lithium iron phosphate cathode, a graphite anode, and an electrolyte that allows lithium ions to move between the electrodes. The chemistry is known for excellent stability, good safety characteristics, and a long cycle life. A single LiFePO4 cell has a nominal voltage of approximately 3.2V. A 12V LiFePO4 battery normally uses four cells in series and has a nominal voltage of about 12.8V. When fully charged, many 12V LiFePO4 batteries reach about 14.2V to 14.6V, depending on the manufacturer’s recommended charge setting. Why Charging Requirements Matter LiFePO4 batteries do not charge in the same way as flooded lead-acid, AGM, or gel batteries. They need a charging profile that controls voltage and current accurately. A suitable charger helps the battery reach full capacity without applying unnecessary float, equalisation, or repair stages intended for lead-acid batteries. Correct charging is especially important for European applications such as motorhome leisure batteries, caravan battery banks, narrowboat systems, yachts, solar installations, and portable power systems. These setups often combine mains chargers, solar charge controllers, DC-DC chargers, and inverters, so every charging source should be compatible with LiFePO4 chemistry. Recommended LiFePO4 Charging Voltage The exact charging voltage should always come from the battery manufacturer’s manual. The values below are common ranges for many LiFePO4 battery systems. Battery System Nominal Voltage Common Full Charge Voltage Typical European Applications 12V LiFePO4 12.8V 14.2V to 14.6V Motorhomes, caravans, boats, leisure batteries, solar storage 24V LiFePO4 25.6V 28.4V to 29.2V Marine systems, mobility equipment, off-grid power 48V LiFePO4 51.2V 56.8V to 58.4V Solar storage, golf carts, server rack batteries For many 12V LiFePO4 batteries, a charger set around 14.4V is commonly suitable. However, some batteries may recommend slightly different settings. Using the correct voltage helps prevent overvoltage protection, undercharging, or unnecessary stress on the battery cells. Charging Current Requirements The recommended charging current depends on the battery capacity and the manufacturer’s maximum charge rating. A 100Ah LiFePO4 battery may be charged with a 20A to 50A charger if the battery supports that range. A larger battery bank may accept more current, but the charger, cables, fuses, connectors, and BMS must all be rated for it. For daily use in motorhomes, caravans, and boats, a moderate charging current is often a good balance between speed and battery care. Charging at the maximum rate is not always necessary unless fast turnaround is required. Understanding the CC/CV Charging Profile LiFePO4 batteries are normally charged using a constant current / constant voltage charging profile. This is often written as CC/CV. Constant current stage: The charger supplies a steady current while the battery voltage rises. Constant voltage stage: Once the battery reaches the target voltage, the charger holds that voltage while current gradually decreases. Charge completion: When current falls to a low level, the charger stops or enters a safe standby mode. This process is different from lead-acid charging. Lead-acid batteries often use bulk, absorption, and float stages. LiFePO4 batteries do not require a continuous float stage in the same way because they do not suffer from sulfation. Why Use a Dedicated LiFePO4 Charger? Dedicated chargers for LiFePO4 batteries are designed to deliver the correct voltage, current, and charging profile for lithium iron phosphate chemistry. They help charge the battery efficiently while reducing the risk of overcharging or improper charge termination. Features to Look For LiFePO4-specific charging profile Correct voltage output for 12V, 24V, or 48V systems CC/CV charge control Automatic shut-off or standby function Overvoltage, overcurrent, and short-circuit protection Clear charging status display Suitable connector and current rating Benefits of a Proper Charger Helps the battery charge to its intended capacity Reduces the risk of cell stress from incorrect voltage Improves charging efficiency Supports longer cycle life Works more smoothly with the battery’s BMS Reduces the chance of nuisance shutdowns during charging Can You Charge LiFePO4 with a Lead-Acid Charger? Some lead-acid chargers may work only if their voltage output is within the safe LiFePO4 range and they do not include equalisation, desulfation, or high-voltage repair modes. However, this should be treated as a temporary solution rather than the preferred method. Many lead-acid chargers are designed to maintain float voltage or run charging stages that are not ideal for lithium batteries. A charger that applies equalisation voltage can trigger BMS protection or damage the battery. For regular charging, a LiFePO4-compatible charger is the better choice. Solar Charging for LiFePO4 Batteries LiFePO4 batteries are a strong match for solar energy systems. They are commonly used in motorhomes, caravans, boats, garden cabins, remote buildings, and home energy storage setups. A solar charge controller must always be used between the solar panels and the battery. The controller should offer a lithium profile or adjustable user settings. The absorption voltage, charge current, and low-temperature settings should be configured according to the battery manual. Directly connecting solar panels to a LiFePO4 battery is unsafe because voltage and current must be regulated. Charging from Alternators and DC-DC Chargers Motorhome, campervan, and marine users often charge LiFePO4 batteries from an alternator while travelling. A DC-DC charger is normally recommended because it controls the charging current and provides a lithium-compatible charging profile. Large LiFePO4 battery banks can draw substantial current if connected directly to an alternator. This may overheat or overload the alternator. A DC-DC charger helps protect the vehicle charging system and improves charging consistency. Temperature Limits for Charging Most LiFePO4 batteries should not be charged below 0°C (32°F) unless they have approved self-heating or low-temperature charging protection. Charging below freezing can cause lithium plating inside the cell, which may permanently reduce battery capacity and shorten service life. For batteries installed in unheated motorhome compartments, boats, garages, sheds, or outdoor solar systems, low-temperature cut-off protection is highly recommended. If the battery has Bluetooth monitoring, check the internal temperature before charging in winter conditions. Safety and the Role of the BMS The battery management system, or BMS, monitors the battery’s cells, voltage, current, and temperature. It helps protect against overcharging, over-discharging, overcurrent, short circuits, and unsafe temperature conditions. In a LiFePO4 battery pack, the BMS is essential for safe operation. Even so, the BMS should be seen as protection rather than a charging method. The charger, solar controller, or DC-DC charger should already be set correctly for LiFePO4 batteries. This reduces stress on the BMS and helps the battery operate more efficiently. Best Practices for Charging LiFePO4 Batteries Use a lithium-compatible charger: A LiFePO4-specific charger is best for routine charging. Match the voltage: Use the correct charger for 12V, 24V, or 48V battery systems. Follow the manual: Battery manufacturers may specify different charging voltages or current limits. Avoid equalisation charging: Lead-acid equalisation modes are not suitable for LiFePO4 batteries. Use a lithium solar controller: Configure solar charging settings before connecting the system. Install a DC-DC charger for alternator charging: This is recommended for motorhomes, campervans, and boats. Do not charge below 0°C: Use low-temperature cut-off or self-heating if winter charging is expected. Check wiring and protection: Use correct cable size, fuses, and connectors for the charging current. Conclusion LiFePO4 batteries can deliver excellent performance for motorhomes, caravans, boats, solar systems, mobility equipment, and backup power, but proper charging is essential. The right charging setup should use a CC/CV profile, correct voltage, suitable current, and safe charge termination. For European users, the best approach is to use a dedicated LiFePO4 charger or properly configured lithium-compatible charging equipment. Solar controllers, mains chargers, and DC-DC chargers should all be set according to the battery manufacturer’s requirements. With correct charging habits, LiFePO4 batteries can provide safe, efficient, and long-lasting power for a wide range of applications.
Will Any 6-Volt Battery Work In A Golf Cart?

Blog

Will Any 6V Battery Work in a Golf Buggy? Read This First

by VatrerZachary on Dec 23 2024
Not every 6-volt battery is suitable for a golf buggy. The battery must be a deep cycle battery designed for repeated discharge and recharge. A random 6V battery may have the right voltage, but it may not have the capacity, construction, terminal layout, or charging compatibility needed for golf buggy use. This is important for golf clubs, holiday parks, private estates, resorts, campsites, and individual owners. A buggy battery has to deliver steady power over a full round, a working shift, or repeated short journeys. A normal starting battery is not built for that job. If your buggy uses 6V batteries, replace them with matching 6V deep cycle batteries that suit the original system voltage, tray size, charger, and performance needs. Quick Answer: Which 6V Battery Does a Golf Buggy Need? A golf buggy needs a 6V deep cycle battery, not just any 6V battery. In many older 36V buggies, six 6V batteries are wired in series to create the full 36V battery pack. Some 48V buggies may use eight 6V batteries, but many 48V systems use 8V or 12V batteries instead. Common Golf Buggy Battery Layouts Buggy System Voltage Common Battery Layout What to Check 36V 6 × 6V batteries Common on many older electric golf buggies 48V 8 × 6V batteries Used on some models; confirm charger and tray layout 48V 6 × 8V or 4 × 12V batteries Common on other models; do not replace with 6V unless designed for it Always check the buggy’s total system voltage before ordering batteries. The number on one battery is only part of the full pack. Why Any 6V Battery Is Not Good Enough A 6V battery can be made for many different purposes. Some are designed for deep cycling. Others are made for starting engines, lighting, standby power, or light-duty equipment. A golf buggy needs a battery that can handle traction-style use. Deep Cycle vs Starting Battery A deep cycle battery is designed to provide steady power for a long time. That is what a golf buggy needs when driving across a course, through a resort, around a campsite, or across private land. A starting battery is designed to provide a short high-power burst. It may not survive long in a buggy because it is not built for repeated deep discharge. Capacity Affects Range The amp-hour rating, or Ah, tells you how much energy the battery can store. A higher Ah rating usually means more driving range. A low-capacity 6V battery may fit in the tray but still leave the buggy with poor runtime. Size and Terminal Layout Must Fit Golf buggy battery compartments are built for specific battery sizes. A battery that is too tall, too wide, or has the wrong terminal position can be difficult or unsafe to install. Before buying, check: Length, width, and height Terminal position Battery hold-down brackets Cable length and routing Clearance under the seat or battery cover Types of 6V Batteries for Golf Buggies Flooded Lead-Acid 6V Batteries Flooded lead-acid batteries are the traditional option for many electric golf buggies. They are widely available and usually cost less upfront. Advantages: Lower purchase cost Common replacement option Good performance when maintained properly Suitable for many older 36V buggies Disadvantages: Need regular distilled water checks Require terminal cleaning Can cause corrosion in the battery tray Heavy compared with lithium alternatives AGM 6V Batteries AGM batteries are sealed lead-acid batteries. They are cleaner and easier to maintain than flooded batteries. Advantages: No watering required Sealed and spill-resistant Better vibration resistance Lower maintenance Disadvantages: More expensive than flooded lead-acid Still heavy Requires compatible charging May not offer the weight savings of lithium Gel 6V Batteries Gel batteries are sealed and use a gel electrolyte. They can work in some buggy systems but need careful charging. Advantages: Sealed design Low maintenance Good spill resistance Disadvantages: Sensitive to incorrect charging voltage Needs a charger suitable for gel batteries Often costs more than flooded lead-acid Less common for standard golf buggy replacements Can You Mix Different 6V Batteries? No. Mixing batteries is one of the most common mistakes in golf buggy maintenance. A battery pack should be matched as closely as possible. Avoid mixing: New and old batteries Flooded, AGM, and gel batteries Different Ah ratings Different brands or models with different specifications Starting batteries with deep cycle batteries A mismatched pack can charge unevenly, lose range, and wear out faster. In fleet use, it can also create more downtime and service calls. What to Check Before Buying a 6V Battery System Voltage Confirm whether the buggy is 36V, 48V, or another setup. Count the batteries and check the voltage label on each one. Do not change the voltage layout unless the whole system is being converted properly. Battery Capacity Choose an Ah rating that suits the use. A golf club fleet buggy doing full rounds all day needs more reserve capacity than a private buggy used lightly on flat ground. Charger Compatibility The charger must match the battery chemistry and full pack voltage. A flooded lead-acid charger may not be suitable for AGM or gel batteries. If the charger is wrong, battery life can be shortened quickly. Battery Tray and Cable Fit Check dimensions and terminal layout before buying. Poor fitment can create unsafe cable routing, loose batteries, or difficult maintenance access. Maintenance Requirements Flooded batteries need regular checks. For golf clubs, resorts, and commercial sites, this maintenance time should be included in the total cost. AGM or lithium options may cost more upfront but reduce routine work. Pros and Cons of 6V Golf Buggy Batteries Advantages: Cost-effective: Flooded 6V batteries are often cheaper to buy. Widely available: Easy to source from battery suppliers and buggy service companies. Good performance: A properly matched 6V pack can power many older buggies well. Familiar technology: Many technicians and workshops understand these systems. Disadvantages: Maintenance: Flooded batteries need water checks and cleaning. Weight: A full lead-acid pack is heavy. More connections: Six or eight batteries mean more cables and terminals to inspect. Charging sensitivity: AGM and gel batteries need correct charger settings. Environmental handling: Lead-acid batteries must be recycled and disposed of properly. Should You Stay with 6V Batteries? If the buggy was built for 6V batteries and you want a straightforward replacement, a matched set of quality 6V deep cycle batteries is usually the easiest option. This is common for older 36V buggies and fleet carts where the charging equipment is already set up for lead-acid. If you want less maintenance, lower weight, faster charging, and longer service life, it may be worth comparing AGM or lithium upgrade options. A lithium conversion can be excellent, but it must be planned properly with the right voltage, charger, BMS, mounting, and accessory wiring. FAQ Will any 6V battery work in a golf buggy? No. The battery must be a deep cycle battery suitable for golf buggy or traction use. A regular 6V starting battery is not designed for this job. How many 6V batteries does a 36V golf buggy use? Most 36V golf buggies use six 6V batteries wired in series. Can I replace one 6V battery instead of the full set? You can, but it is not always wise if the rest of the pack is old. Mixing one new battery with older batteries can lead to imbalance and poor performance. Are AGM batteries better than flooded 6V batteries? AGM batteries are cleaner and require less maintenance, but they cost more and still need the correct charger. Flooded batteries are cheaper but need regular watering. Can I change from 6V batteries to lithium? Yes, but it should be treated as a proper conversion. The battery voltage, charger, BMS, cable sizing, mounting, and accessory wiring must all be checked. Conclusion Any 6V battery will not work properly in a golf buggy. You need a matched set of 6V deep cycle batteries with the right capacity, size, terminal layout, chemistry, and charger compatibility. For many older 36V buggies, that means six matching 6V deep cycle batteries wired in series. Flooded lead-acid batteries remain the affordable traditional choice, while AGM and gel batteries reduce maintenance but require correct charging. The safest and most reliable option is to match the battery pack to the buggy’s original design and real-world use. That gives better range, safer charging, and longer battery life.
Speed of a 55 lb Thrust Trolling Motor

Blog

How Fast Is a 55 lb Thrust Trolling Motor?

by VatrerZachary on Dec 20 2024
A 55 lb thrust trolling motor can achieve speeds of up to 5 mph under ideal conditions, making it suitable for small to medium-sized boats. However, the actual speed is influenced by various factors, including boat weight, battery type, propeller design, and environmental conditions.
What Happens If I Charge An AGM Battery With A Regular Charger?

Blog

Using a Regular Charger on an AGM Battery: Is It Safe?

by Larson Emma on Dec 20 2024
Charging an AGM battery with an ordinary battery charger can be safe, but only when the charger uses a charging profile that suits AGM technology. The fact that both the battery and charger are marked 12V does not by itself prove that they are compatible. A modern automatic charger may manage an AGM battery correctly even without a dedicated AGM setting. A basic manual charger that continues applying charging voltage until it is disconnected requires much more caution. For batteries used in motorhomes, caravans, boats, classic cars, motorcycles, solar storage systems, or workshop equipment, the best approach is to compare the charger specification directly with the battery manufacturer’s charging requirements. Can an AGM Battery Be Charged With a Normal Charger? Yes, in some cases. The charger needs to regulate voltage correctly, remain within the permitted charging-current range, and reduce its output appropriately once the AGM battery approaches full charge. A dedicated AGM mode makes this easier, but the absence of that label does not automatically make a charger unsuitable. Automatic Chargers Are Different From Old Manual Chargers Automatic chargers monitor the battery while charging and change their output as the state of charge increases. Many provide bulk, absorption and maintenance stages without requiring manual intervention. Traditional manual chargers may provide far less control. If they continue charging after the battery is effectively full, the risk of excessive heat and overcharging increases. Read the Technical Specification Check the charger documentation for AGM, SLA, VRLA, sealed lead-acid or absorbed glass mat compatibility. If the charger manufacturer does not provide enough information to compare its output with your battery specification, it is safer to use a charger with clearly documented AGM support. What Happens When an AGM Battery Is Charged Incorrectly? The most common problems are not necessarily immediate failure. Charging mistakes often reduce battery performance gradually. Excessive Charging Can Cause Heat and Venting An AGM battery keeps its electrolyte inside absorbent glass mats and operates as a sealed, valve-regulated battery. When charging voltage remains too high, internal temperature and gas pressure can rise. If the pressure-relief valve opens, moisture may escape. Unlike a serviceable flooded battery, that lost water cannot simply be topped up. Repeated overcharging can therefore reduce capacity and shorten battery life. Incomplete Charging Can Promote Sulfation A charger that switches off too soon can also cause long-term problems. If an AGM battery repeatedly remains partly charged, sulphate crystals can build up on the plates and reduce the battery’s ability to store and deliver energy. That makes proper absorption charging just as important as preventing overcharging. Performance Usually Declines Gradually Usable running time becomes shorter. The battery needs charging more frequently. Voltage drops unusually quickly when equipment is switched on. The battery becomes much hotter than usual while charging. The charger repeatedly stops early or reports a fault. Starting performance becomes weaker. These symptoms can also have other causes, so proper testing is preferable to assuming the charger is solely responsible. Will One Use of the Wrong Charger Destroy the Battery? Not necessarily. A single charging session does not automatically mean an AGM battery has been permanently damaged. The outcome depends on charging voltage, current, charging time, battery temperature and the battery’s previous condition. If the case stayed at a reasonable temperature, did not swell or deform, and the battery continues to hold charge normally, a brief mistake may have caused little or no measurable harm. The bigger concern is repeated use of a poorly matched charger over many charging cycles. How AGM Charging Normally Works AGM batteries belong to the lead-acid family, but that does not mean every charger intended for a conventional flooded battery should automatically be used. A suitable charger changes its behaviour as the battery becomes full. Bulk Charging During the bulk stage, the charger supplies much of the energy required to restore the discharged capacity. Absorption Charging As the battery approaches full charge, voltage is controlled while charging current gradually falls. This allows the battery to finish charging without being pushed excessively. Maintenance or Float Charging After the battery is full, the charger reduces its output to a maintenance level. This helps keep the battery ready for use without leaving it continuously at the higher absorption voltage. There Is No Universal AGM Charging Voltage It is tempting to search for one charging voltage and apply it to every AGM battery, but manufacturers can specify different charging limits. Battery construction, capacity, application and temperature can all influence the recommended settings. Always prioritise the charging information for the exact AGM battery you own. Compare the battery specification with the charger’s absorption voltage, maintenance voltage and charging-current limit. Temperature Compensation Can Be Valuable AGM charging behaviour changes as temperature changes. High battery temperature can increase the risk of aggressive charging, while colder conditions affect charge acceptance. A charger equipped with temperature compensation can adjust its output accordingly. This is particularly useful for batteries installed in motorhomes, caravans, boats, garages, workshops and other locations where temperatures can vary significantly through the year. AGM Charger vs Ordinary Charger Feature AGM-Compatible Charger Basic Ordinary Charger AGM support Specified by manufacturer Must be checked individually Voltage regulation Closely controlled Varies considerably Multi-stage operation Normally available May not be included Automatic maintenance Common Not always available Temperature compensation Available on many models Less common Manual supervision Usually limited May be necessary A modern smart charger may therefore be fully suitable for AGM batteries even if it is sold as a general-purpose charger. How to Check Your Charger Before Using It Confirm Battery Chemistry Support Look at the instruction manual or technical data sheet. AGM, VRLA, SLA or sealed lead-acid compatibility should be clearly identified. Compare Charging Voltage Check whether the charger’s charging and maintenance voltages remain inside the battery manufacturer’s recommended range. Check Maximum Charging Current The battery specification should also state an acceptable charging-current range or limit. A charger with lower output may simply require more time. Higher output is not automatically better if it exceeds what the battery is designed to accept. Prefer Automatic Multi-Stage Charging Automatic multi-stage charging removes much of the guesswork from routine AGM charging. Temperature compensation, maintenance mode, reverse-polarity protection and charging-status indicators are also useful features. What If You Have Already Used the Charger? Stop if the Battery Is Excessively Hot Disconnect the charger if the battery becomes very hot, swells, develops a strong smell or shows obvious case deformation. Do not continue charging a physically damaged battery. Allow the Battery to Settle Let the battery rest after charging before assessing resting voltage. Immediately after charging, surface charge can make the voltage reading appear higher than the battery’s settled condition. Check Actual Performance Run the battery under its normal load and compare runtime or starting ability with previous performance. If there has been a substantial change, a load or capacity test can provide better information than a voltage measurement alone. How to Charge an AGM Battery Safely Confirm charger compatibility before charging and select AGM mode when the charger provides one. Avoid equalisation, repair, reconditioning or high-voltage desulfation programmes unless the AGM battery manufacturer specifically approves them. Connect the charger according to the manufacturer’s instructions and keep ignition sources away from the battery area. Monitor charging status and battery temperature. Stop charging if there is major heating, swelling, physical deformation or repeated charger faults. When an AGM-Compatible Charger Is Worth Buying If an AGM battery is charged regularly, a modern automatic charger with documented AGM compatibility is usually a sensible investment. Look for a suitable charging-current range, controlled bulk and absorption stages, automatic maintenance charging and temperature compensation where conditions vary significantly. Considering a different battery chemistry? LiFePO4 batteries are increasingly used in motorhomes, boats and off-grid energy systems. Vatrer’s 12V lithium battery range includes battery-management and monitoring features. A lithium battery must still be paired with a charger that supports the correct lithium charging profile. Final Verdict A regular charger will not automatically damage an AGM battery. What matters is the charger’s actual charging behaviour. If it controls voltage correctly, stays within the battery’s charging-current limits and provides suitable absorption and maintenance stages, it may work perfectly well. A poorly controlled charger can overcharge the battery, while an unsuitable automatic programme can leave it repeatedly undercharged. If you used a regular charger once and the battery remains cool, undamaged and performs normally, it may still be in good condition. For ongoing charging, check the technical specifications rather than relying solely on nominal battery voltage. For users moving to LiFePO4 storage, Vatrer provides battery options for mobile and off-grid applications. Always combine the chosen battery chemistry with suitable lithium battery charging equipment.
Comparison Between LiFePO4 and Lead-Acid Battery Discharge

Blog

LiFePO4 vs Lead-Acid Discharge: A Practical Battery Guide

by VatrerZachary on Dec 18 2024
When comparing LiFePO4 and lead-acid batteries, the real question is not only which one is cheaper. The better question is: which battery gives you more usable power, steadier voltage, and better value over time? This matters for motorhomes, caravans, campervans, boats, solar storage systems, mobility equipment, backup power, and leisure battery setups across Europe. A battery may look suitable on paper, but its discharge behaviour decides how well it performs in daily use. Lead-acid batteries are still common because they are affordable and widely available. LiFePO4 batteries, also known as lithium iron phosphate batteries, cost more at the start but usually deliver far better deep-cycle performance. This guide explains the discharge differences in clear, practical terms so you can choose the right battery for your application. What Does Battery Discharge Mean? Battery discharge is the process of using stored energy. When your caravan lights are on, your motorhome fridge is running, your boat electronics are powered, or your inverter is supplying AC loads, the battery is discharging. The key point is that different battery chemistries discharge differently. A 100Ah lead-acid battery and a 100Ah LiFePO4 battery do not normally provide the same practical usable energy. Here are the discharge factors that matter most: Depth of discharge: How much of the battery capacity can be safely used. Voltage stability: How steady the output voltage remains during discharge. Discharge rate: How well the battery handles higher power demand. Cycle life: How many charge and discharge cycles the battery can complete. Maintenance: How much care is needed to preserve performance. How Lead-Acid Batteries Discharge Lead-acid batteries use lead plates and a sulphuric acid electrolyte. During discharge, the battery produces electrical energy through a chemical reaction that forms lead sulphate. Charging reverses the process. This technology has been used for many years in vehicles, UPS systems, backup power, marine applications, and leisure battery banks. In Europe, lead-acid batteries are available in several forms, including flooded, AGM, and gel types. Lead-Acid Batteries Have Limited Usable Capacity The main discharge limitation of lead-acid is that it should not be deeply discharged too often. For longer service life, many deep-cycle lead-acid batteries are commonly kept above about 50% state of charge. This means a 100Ah lead-acid leisure battery may only provide around 50Ah of recommended usable capacity if you want it to last. Discharging it further may work in the moment, but repeated deep discharge can reduce capacity and shorten the battery’s life. Lead-Acid Voltage Falls as the Battery Drains Lead-acid batteries also experience a steady voltage drop during discharge. As the battery drains, the voltage becomes lower. Under heavier loads, the drop can be even more noticeable. In practical terms, this may cause an inverter to cut out early, a motor to feel weaker, or sensitive equipment to behave less reliably. For motorhome and marine users, this voltage drop can be frustrating because the battery may still have some remaining capacity but not enough voltage to run equipment properly. How LiFePO4 Batteries Discharge LiFePO4 Batteries use lithium iron phosphate chemistry. They move lithium ions inside the battery during charge and discharge. This chemistry is well known for stable performance, long cycle life, and strong safety characteristics compared with many other lithium battery types. For deep-cycle use, LiFePO4 has a clear advantage: it allows much more of the rated capacity to be used while keeping voltage more consistent. LiFePO4 Batteries Offer More Usable Energy Most LiFePO4 batteries can be discharged to 80% or 90% depth of discharge without the same level of wear expected from lead-acid. Many include a battery management system, or BMS, which helps protect the battery from unsafe operating conditions. That means a 100Ah LiFePO4 battery may give you around 80Ah to 90Ah of usable energy. Compared with the roughly 50Ah commonly recommended from a 100Ah lead-acid battery, the difference is significant. LiFePO4 Batteries Keep Voltage More Stable LiFePO4 batteries have a flatter discharge curve. Instead of losing voltage gradually throughout the cycle, they hold a steady voltage for much longer. For users, this means more consistent performance from appliances, electronics, motors, and inverters. This is one reason LiFePO4 batteries are popular in motorhomes, campervans, boats, and solar storage systems. The power does not fade as quickly, and more of the battery’s capacity remains usable. LiFePO4 vs Lead-Acid Discharge Comparison Discharge Feature LiFePO4 Battery Lead-Acid Battery Recommended usable capacity Usually 80% to 90% Usually around 50% Voltage behaviour Stable for most of the discharge cycle Falls gradually as the battery drains High-current loads Handles them better with less voltage sag More likely to sag under load Cycle life Commonly 2,000 to 5,000 cycles Commonly 200 to 1,000 cycles Weight Lighter for the same usable energy Heavier and bulkier Typical use Motorhomes, caravans, boats, solar, off-grid, frequent cycling Budget leisure batteries, backup, starting, light-duty use Depth of Discharge: Why the Same Ah Rating Can Be Misleading Depth of discharge, often written as DoD, shows how much of a battery’s stored capacity has been used. If you use 70Ah from a 100Ah battery, the battery has reached 70% depth of discharge. With lead-acid, regularly using that much capacity can reduce life. With LiFePO4, deeper discharge is normal and expected. This makes LiFePO4 batteries more efficient for real-world deep-cycle applications. For example, if your campervan needs 160Ah of usable capacity for a few days off-grid, a lead-acid system may need to be much larger to avoid deep discharge. A LiFePO4 system can often achieve the same usable energy with fewer batteries and less weight. Discharge Rate and Voltage Sag Discharge rate is important when the battery needs to deliver a lot of power at once. Common examples include running an inverter, using a compressor fridge, powering a bow thruster, operating a motor, or supporting solar battery loads in the evening. Lead-acid batteries tend to suffer more voltage sag under higher loads. This voltage drop can cause equipment to run poorly or shut down early. LiFePO4 batteries usually manage higher discharge rates more effectively and maintain voltage better. Why Stable Voltage Makes a Difference Stable voltage means your equipment receives more consistent power. In a caravan or motorhome, this helps fridges, lights, pumps, and inverters operate more reliably. On a boat, it helps electronics and motors perform more predictably. In a solar storage system, it helps you access stored energy more efficiently. This is one of the biggest everyday advantages of LiFePO4. The battery does not just store energy; it delivers that energy in a more useful way. Energy Density, Weight, and Space LiFePO4 batteries have higher practical energy density than lead-acid batteries. They can store more usable energy in less space and with less weight. This matters in European motorhomes, caravans, canal boats, sailing boats, and compact off-grid installations where every kilogram and storage compartment counts. A lead-acid bank may be cheaper to buy, but it can take up more room and add considerable weight. A LiFePO4 upgrade can often reduce weight while increasing usable capacity. Cycle Life and Long-Term Cost Lead-acid batteries are usually cheaper upfront, but they may need replacing sooner if they are cycled deeply and often. LiFePO4 batteries are more expensive at the beginning, but they commonly provide thousands of cycles when used with the correct charger and settings. For occasional users, lead-acid may still be acceptable. For regular touring, off-grid camping, marine use, or daily solar cycling, LiFePO4 often becomes the better value over time because the cost per usable cycle is lower. Charging After Discharge Lead-acid batteries can take a long time to recharge fully, especially during the final stage of charging. They also need to be charged correctly to reduce sulphation and capacity loss. LiFePO4 batteries charge more efficiently and can usually accept higher charging current when the charger is suitable for lithium batteries. For users relying on solar panels, campsite hook-up, DC-DC chargers, or generator charging, this can make a big difference. Maintenance and Day-to-Day Use Flooded lead-acid batteries require regular checks, including electrolyte levels and terminal condition. They also need proper ventilation and careful handling. AGM and gel batteries are easier to maintain, but they still have lead-acid discharge limits. LiFePO4 batteries are generally low maintenance. A good BMS helps protect the battery against over-discharge, overcharge, short circuits, and temperature issues. This makes LiFePO4 easier to manage for users who want reliable leisure power without constant battery maintenance. Safety and Environmental Considerations Lead-acid batteries are widely recycled, which is a major advantage. However, they contain lead and sulphuric acid, so they must be handled and disposed of properly through approved recycling channels. LiFePO4 batteries do not contain lead or liquid acid and are known for stable chemistry. Recycling availability can vary by country, but the longer lifespan means fewer replacements over time. As with any battery, proper recycling is still important. Which Battery Should You Choose? LiFePO4 Is Better for Frequent Deep Discharge Choose LiFePO4 if you regularly use your battery bank for motorhome travel, caravan leisure power, solar storage, marine systems, off-grid cabins, or equipment that cycles often. You get more usable capacity, better voltage stability, lower weight, faster charging, and longer cycle life. Lead-Acid Is Better for Low-Cost or Occasional Use Lead-acid can still be a reasonable choice if you need a low upfront price, use the battery occasionally, or need a simple starter or standby battery. It is widely available and familiar, but it needs more care and should not be deeply discharged too often. FAQ Does LiFePO4 discharge better than lead-acid? Yes, for deep-cycle use. LiFePO4 batteries can usually discharge deeper, maintain steadier voltage, and handle repeated cycles much better than lead-acid batteries. Can a LiFePO4 battery replace a lead-acid leisure battery? Often yes, but you need to check charger compatibility, BMS protection, cable sizing, space, and whether your system supports lithium charging profiles. Why does my lead-acid battery drop voltage so quickly? Lead-acid batteries naturally lose voltage as they discharge. Under heavier loads, the voltage drop becomes more noticeable, especially when the battery is partly drained. Is LiFePO4 worth it for a caravan or motorhome? For frequent touring or off-grid use, usually yes. The higher upfront cost is balanced by more usable capacity, lighter weight, faster charging, and longer service life. Final Thoughts LiFePO4 and lead-acid batteries discharge very differently. Lead-acid batteries are cheaper and familiar, but they usually provide only about half their rated capacity for healthy long-term use and their voltage drops steadily during discharge. LiFePO4 batteries cost more upfront, but they deliver more usable energy, hold voltage more steadily, handle deeper discharge, and last through many more cycles. For European motorhomes, caravans, boats, solar systems, and off-grid power setups, LiFePO4 is usually the stronger choice when performance and long-term value matter. Lead-acid still has a place in budget or occasional-use systems, but for demanding deep-cycle use, LiFePO4 offers a clear discharge advantage.
Testing Circuit Breakers: A Comprehensive Guide

Blog

Testing Circuit Breakers: A Comprehensive Guide

by VatrerZachary on Dec 18 2024
Regularly testing circuit breakers is essential for maintaining a safe and reliable electrical system. It ensures that breakers are functioning correctly, providing protection against electrical faults, and complying with safety regulations.