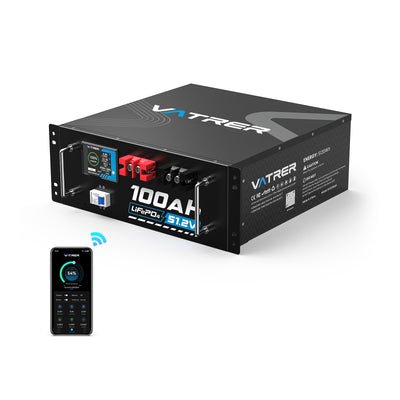
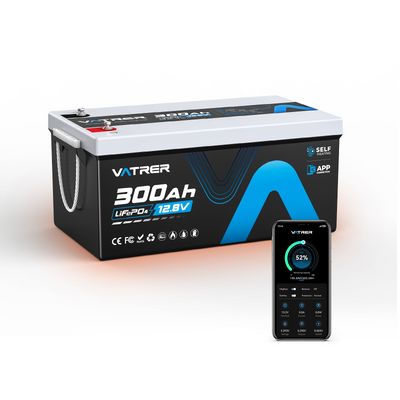
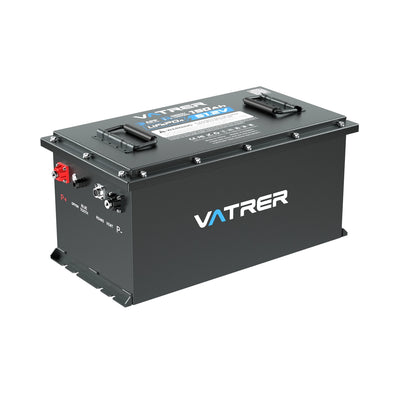
Lithium batteries are widely recognised for being lighter, more efficient, and longer-lasting than conventional lead-acid batteries. However, this more advanced chemistry is also more sensitive to how the battery is charged, discharged, and used day to day. If a lithium battery is overcharged, drained too deeply, or subjected to very high or very low temperatures, it can suffer irreversible damage or in extreme cases trigger thermal runaway, a rapid overheating reaction that can cause the pack to fail. This is why every modern lithium battery requires a Battery Management System (BMS), essentially the “control centre” that keeps the battery safe, efficient, and dependable. A lithium battery BMS continuously supervises the battery pack, making sure each cell stays within safe operating limits while also improving performance and helping to extend service life. What Is a BMS and How Does It Work A Battery Management System (BMS) is an electronic control unit built into, or connected to, a rechargeable battery pack. It provides ongoing measurement and tracking of voltage, current, temperature, and overall cell condition. Put simply, the BMS keeps an eye on every cell, calculates safe charging and discharging limits, and manages how energy flows into and out of the battery pack. When it detects abnormal conditions such as excessive voltage, overheating, or a short circuit, it responds immediately by reducing or cutting off current, or by adjusting power flow. You can think of it as a combined monitoring and protection system that prevents misuse and stops the battery being operated unsafely. Without this layer of control, even the best lithium battery could age prematurely or fail in a severe way. Core Functions of a Battery Management System Most BMS designs focus on three main roles: Monitoring, Protection, and Optimization. Together, these functions are essential to keeping your lithium batteries safe and performing consistently. 1. Monitoring — Real-Time Health Check The BMS continuously tracks a range of key values: Voltage: keeps each cell operating within its permitted range. Current: prevents excessive current draw during charging or discharging. Temperature: ensures the battery is not charged when too cold or discharged when too hot. State of Charge (SOC): indicates how much usable energy remains in the pack. State of Health (SOH): reflects how the battery has aged and how much capacity it has retained. With this information, the BMS can decide exactly when to limit or stop charging and discharging before any permanent damage occurs, helping to maintain safe, stable operation. 2. Protection — Preventing Damage and Hazards One of the most important responsibilities of a battery management system BMS is to act as a safety barrier. It helps avoid harmful conditions such as overcharging, over-discharging, and short circuits that could ruin a battery pack. Protection Type What It Does Why It Matters Overcharge / Over-Discharge Stops charging above the safe voltage and prevents discharging too far. Reduces the risk of cell swelling, gas formation, and chemical damage. Short Circuit Protection Detects extremely high current spikes and disconnects power at once. Helps prevent fires and thermal runaway events. Temperature Control Limits or stops charging when outside the recommended range (typically 32°F–113°F). Avoids low-temperature lithium plating and heat-related failures. Tips: Never bypass or tamper with a BMS in an attempt to gain more power. Doing so disables essential safety features and will usually cancel any warranty coverage. 3. Optimization — Smart Balancing and Efficiency Over months and years of use, individual battery cells can drift slightly apart in voltage and capacity because of self-discharge and ageing. A BMS improves overall performance through cell balancing, keeping all cells as closely matched as possible. There are two main balancing strategies: Passive Balancing: bleeds off a small amount of energy from higher-voltage cells until they line up with the lower ones. Active Balancing: actively moves charge from stronger cells to weaker ones to improve efficiency. Keeping cells balanced increases usable capacity, supports more consistent power delivery, and reduces stress on individual cells, allowing the battery to perform reliably for a longer period. Maintaining the Optimal Temperature Range of the Lithium Battery BMS Temperature is one of the most influential factors in battery health. A well-designed BMS helps keep the battery within a suitable temperature window — not too cold, not too hot. At low temperatures (below 32°F), charging can cause metallic lithium to plate onto the anode surface, permanently reducing capacity and safety. At high temperatures (above 113°F), the battery can lose a large portion of its efficiency and will wear out much more quickly. Modern battery systems may incorporate several thermal management approaches, including: Passive cooling using airflow, heatsinks, or conductive materials. Active cooling with fans or liquid-based systems. Self-heating functions in cold conditions to warm cells before charging. Keeping the battery within this “just-right” zone supports higher efficiency, safer operation, and a longer cycle life. Types of Battery Management Systems Different uses call for different BMS architectures. The table below provides a straightforward overview of the main types of battery management systems in use today: BMS Type Description Key Advantage Trade-Off Centralized One controller directly supervises all cells in the pack. Simple layout and generally more affordable. Requires extensive wiring and can be harder to service. Modular Each module manages a group of cells and reports to a main controller. Easy to expand and easier to maintain. Somewhat higher cost compared with fully centralised systems. Primary/Subordinate A main BMS makes decisions while secondary units collect and send data. Good balance between detailed control and overall cost. Relies heavily on the reliability of the main controller. Distributed Every cell or small group of cells has its own small BMS board. Very accurate monitoring with minimal wiring between cells. More expensive and can be more complex to repair. Built-in BMS BMS electronics are fully integrated into the battery housing. Compact, easy to install, and essentially plug-and-play. Less flexibility for very large or custom systems. Why BMS Is So Important for Lithium Batteries Safety Above All A BMS is the primary safety layer against hazardous situations. By enforcing limits on voltage, current, and temperature, it reduces the risk of thermal runaway, fire, and short-circuit damage, helping keep both the battery and people nearby safe. Consistent Performance and Range Thanks to intelligent monitoring and control, the BMS keeps voltage and SOC within a balanced range, delivering a steady power output even as the battery ages. This helps your equipment or vehicle maintain predictable performance and range. Extended Battery Lifespan Every layer of protection — from balancing cells to managing temperature — directly supports longer service life. A well-designed BMS helps lithium batteries achieve thousands of charge cycles with much less loss of capacity. Real-Time Diagnostics and Communication More advanced systems provide Bluetooth or CAN connectivity, allowing users to view performance data, temperatures, and charge status in real time via mobile apps, dashboards, or other displays. Lower Total Cost of Ownership Although including a BMS adds some cost up front, it significantly reduces long-term expenses related to premature failures, replacement packs, or warranty issues, making it a wise investment for almost any energy system. How To Choose the Right BMS When you’re choosing a BMS for your lithium battery system, consider the following: High-accuracy sensors for voltage, current, and temperature. Built-in protection against over-charge, over-discharge, and charging at low temperatures. Effective cell balancing to support long-term stability. Compatible communication options (such as CAN or RS485) for solar, off-grid, or EV applications. Proven quality and testing from a trusted manufacturer. Tips: Be cautious about very low-cost, untested BMS products; poor calibration or slow response times can lead to permanent cell damage or unsafe operation. Common Problems with Low-Quality BMS Units A weak or poorly designed BMS can actually undermine the system it is meant to protect. Common issues include: Incorrect measurements that fail to detect dangerous voltage or temperature spikes. Delayed reaction times, allowing over-current or overheating conditions to persist too long. Inadequate cell balancing, which gradually reduces usable capacity. Unnecessary shutdowns that cut power even though the battery still holds charge. Total failure to intervene during a fault, raising the chance of thermal runaway. Ultimately, the reliability of your BMS largely determines how dependable your entire power system will be. Conclusion A battery management system BMS is not just an optional add-on; it is a core component of any modern lithium-based energy system. By providing protection, maintaining balance, and preventing permanent damage, it helps your lithium batteries remain powerful, safe, and dependable over the long term. Looking for a practical, ready-made solution? Vatrer's lithium batteries include a robust built-in BMS with accurate sensing, intelligent cell balancing, and comprehensive safeguards for over-/under-voltage, over-current, temperature, and short circuit events. This combination offers reliable power with app-level visibility and strong protection for your investment. Whether you are running an RV, golf cart, or solar storage system, Vatrer’s smart BMS approach supports longer lifespan, dependable energy, and real peace of mind. FAQs If my charger already has protections, do I still need a BMS? Yes. A charger can control voltage and current for the whole pack, but a battery management system (BMS) works at the individual cell level and provides continuous oversight of each cell’s voltage, temperature, and state of charge (SOC). That detailed view is what prevents hidden imbalances and local hot spots that a charger alone cannot detect. A BMS also adds short circuit protection, temperature-based cutoffs, and controlled shutdown behaviour—important safeguards during both charging and discharging. In other words, the charger manages how you fill the tank; the BMS safeguards what is happening inside the tank. How do I size and choose the right BMS for my system? Start by matching the BMS to your cell chemistry (for example, LiFePO4), system voltage, and realistic current demands. Use your inverter or controller’s maximum power rating and your loads’ start-up currents as a guide. If you have a 2000W inverter on a 12V system, continuous current can reach roughly 167A (2000W ÷ 12V). Choose a BMS with a continuous rating comfortably above that and a surge rating long enough to handle motors or compressors starting up. Look for accurate sensing, reliable cell balancing, low-temperature charge protection, and communication options (Bluetooth, CAN, or RS485) if you want app monitoring or integration with inverters and solar charge controllers. For small systems, a battery with an integrated BMS is usually easiest; for larger banks or rack systems, modular or master/subordinate BMS designs scale better. What actually happens when a BMS “shuts down” and how do I recover? When a limit is exceeded—such as low voltage, excessive temperature, or over-current—the BMS opens its protection switches (MOSFETs or contactors) and turns the pack off to protect it from damage. Recovery depends on the type of fault. For a low-voltage cutoff, connect an appropriate charger to wake the pack and begin a gentle recharge; for an over-temperature event, allow the battery to cool or warm up into its safe range before trying again; for over-current, remove or correct the load and then power-cycle the system. If shutdowns happen repeatedly, investigate the underlying cause such as cable size, loose connections, incorrect charger settings, or a faulty device. Tip: Many recurring problems are related to charge settings, so always confirm that your charger’s profile matches LiFePO4 limits and the BMS’s high-voltage cutoff. Can I use lithium batteries in cold climates without harming them? Yes, provided they have the right protections and are used properly. Charging below freezing can cause lithium plating, so a quality lithium battery BMS will block charging until the cells have warmed up. Helpful solutions include packs with integrated heaters, preheating with shore power or a DC-DC source, insulating the battery compartment, and planning charge times for the warmer part of the day. For storage, keep the battery at around 40–60% SOC and avoid prolonged exposure to severe cold or heat. Tip: In areas that regularly experience temperatures below zero, consider a Vatrer battery with a built-in BMS and self-heating function so the pack can safely warm itself before accepting charge. How does cell balancing work, and when is active vs. passive balancing worth it? Over many charge and discharge cycles, small differences cause cells to drift apart. Cell balancing brings them back into line so that no single cell becomes the weak link limiting the pack. Passive balancing gently bleeds a little energy from higher-voltage cells near the top of charge and is simple and robust for most RV, marine, and residential solar users. Active balancing transfers energy from stronger to weaker cells and is most beneficial in larger, high-cycle applications where squeezing out every bit of capacity is important. After installing a new pack or adding modules, allow several full charges so the BMS can complete balancing; during this phase, you may notice performance gradually improving as the pack aligns. What communication should I look for Bluetooth, CAN or RS485 and why? Bluetooth is handy for checking data quickly on a phone or tablet—SOC, temperatures, and cycle count, for example. CAN and RS485 provide more advanced integration, allowing the BMS to share real-time limits and status with inverters, chargers, and solar controllers so the whole system can adapt (for instance, reducing charge current if a cell nears its limit). Off-grid power systems and electric vehicles often benefit from CAN for closed-loop control, while fixed solar and larger rack systems may rely on RS485 for longer cable runs and stable networking. Ideally, choose a BMS that supports the same protocol as your inverter or MPPT controller. How do I minimize the risks of thermal runaway and electrical faults? Begin with a reputable BMS and never bypass its protections. Use correctly sized cables and fuses, torque connections to spec, and secure wiring so it cannot loosen through vibration. Keep the battery within its recommended temperature range using ventilation, ducted fans, or liquid cooling plates for high-power setups. Configure charge voltage and current according to the cell chemistry, and activate low-temperature charge lockout where possible. Separate high-current cabling from signal wiring to reduce electrical interference and nuisance trips. Tip: Check the BMS event log if your system provides one. Repeated high-temperature or over-current events are early warning signs that you can address before they become serious. Should I choose a built-in BMS battery or an external BMS system? For most RV, marine, golf cart, and home-solar installations, a battery with an integrated BMS is the most straightforward choice. It simplifies wiring, reduces the chance of configuration errors, and the manufacturer has already matched the BMS to the specific cells. External or stand-alone BMS systems are more suitable for large commercial storage projects, multi-rack installations, or custom systems that need detailed tuning and advanced telemetry. If you are not designing a complex multi-pack system, an all-in-one battery with a built-in BMS is usually the most practical option.