How To Install Lithium Battery In Golf Cart
Reading time 13 minutes
Upgrading your golf cart with a lithium battery can transform your experience, whether you're navigating a golf course, exploring a community, or using it for utility tasks. Compared to traditional lead-acid batteries, lithium offers longer range, faster charging, and less maintenance, making it a practical choice for owners of carts like Yamaha, EZ GO, Club Car, or even a President electric golf cart.
This guide provides a clear, step-by-step process for installing lithium batteries in golf cart, designed for DIY enthusiasts with basic tools. From choosing the right battery to testing your setup, we'll cover everything you need to know to make the switch confidently.

Why Install Lithium Batteries in Your Golf Cart for Better Performance?
Switching to lithium batteries can significantly improve your golf cart's performance, whether it's a Yamaha, Club Car, or President electric golf cart. Compared to traditional lead-acid batteries, installing lithium batteries in golf cart offers practical benefits that enhance your driving experience and reduce upkeep. Here's why this upgrade is worth considering:
- Lighter Weight for Smoother Handling: Lithium batteries weigh 50-60% less than lead-acid ones (like 50-100 lbs vs. 200+ lbs). This reduces strain on your cart's motor and suspension, improving handling on turns or rough terrain for a more responsive ride.
- Longer Lifespan, Fewer Replacements: Expect 8-10 years of use (2,000-4,000 charge cycles) compared to 3-5 years (300-500 cycles) for lead-acid. This durability means less frequent replacements, saving time and money.
- Faster Charging for Less Downtime: Lithium batteries charge in 2-4 hours with a smart lithium charger, getting you back on the course quickly.
- Consistent Power for Reliable Performance: Unlike lead-acid batteries, which lose power as they drain, lithium delivers steady voltage, maintaining speed and torque on hills or long drives.
- Minimal Maintenance, More Convenience: Sealed lithium batteries require no watering or corrosion cleaning, unlike lead-acid, making upkeep simple with just periodic connection checks.
- Eco-Friendly Choice: Their longer lifespan reduces waste, and recyclable materials like lithium and cobalt support sustainable practices.
These advantages make installing lithium batteries in golf cart a smart choice for better performance and ease. Want to know how to pick the right battery for your cart? Let's continue exploring this together.
How to Choose the Right Lithium Battery for Your Golf Cart
Picking the right lithium battery is crucial for a successful upgrade when installing lithium batteries in golf cart. A well-matched battery ensures optimal performance and avoids costly issues. Here's a clear guide to selecting the best battery for your cart, whether it's a Yamaha, Club Car, President electric golf cart, or another model.
- Match Voltage to Your Cart's System: Most golf carts operate on 36V or 48V systems. Check your owner's manual to confirm the voltage requirement. Using a mismatched voltage can damage your cart's electronics, so double-check this spec before buying.
- Estimate Capacity for Your Needs: Capacity, measured in amp-hours (Ah), determines how far you can drive on a single charge. For short trips (like 5-10 miles on flat terrain), a 50-100Ah battery may suffice. For longer drives or hilly courses, opt for 150-200Ah for 20-30 miles of range. Consider your typical usage—daily rounds or heavy loads require higher capacity.
- Choose LiFePO4 for Safety and Longevity: Lithium iron phosphate (LiFePO4) batteries are the preferred choice for golf carts. They're safer, with lower risk of overheating compared to NMC (nickel manganese cobalt) batteries, and offer 2,000-4,000 charge cycles for 8-10 years of use. This makes them ideal for reliable, long-term performance.
- Ensure Proper Fitment: Measure your battery compartment to confirm the battery's dimensions fit snugly. Lithium batteries are more compact than lead-acid, but a loose fit can cause shifting during drives. Refer to your cart's manual for space constraints.
- Verify BMS Inclusion: A Battery Management System (BMS) is essential, monitoring voltage, current, and temperature to prevent overcharging, deep discharge, or thermal issues. A quality BMS balances cells for even performance and displays error codes (like “cell overvoltage”) to alert you to problems, ensuring safety and longevity.
- Consider Accessories and Voltage Reducers: If your cart has 12V accessories (like lights or a horn), you may need a voltage reducer to adjust the output from a 36V or 48V battery. Check compatibility to avoid damaging components.
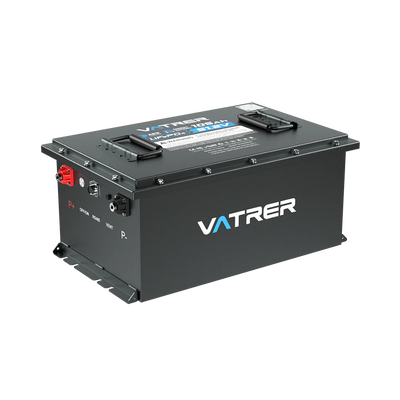
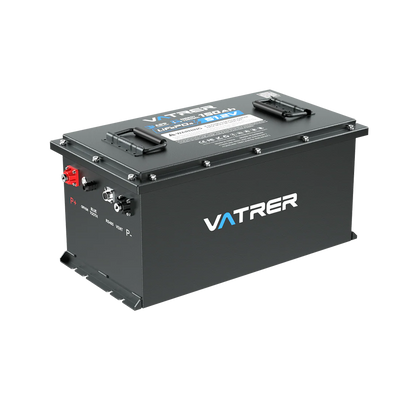
For a dependable option, the Vatrer 48V 100Ah LiFePO4 battery is designed for golf carts, featuring a BMS for enhanced safety and a vibration-resistant build for rough terrain. Their eco-friendly materials and high cycle life make them a practical choice. Explore Vatrer golf cart batteries and find the model that fits your cart brand's needs. Got the right battery? Let's move on to preparing for installation.
Tools and Safety Prep for Installing Lithium Batteries in Golf Cart
Proper preparation is key to installing lithium batteries in golf cart safely and efficiently. Having the right tools and safety measures in place minimizes risks and ensures a smooth process.
You'll need:
- Wrench or socket set (for terminal bolts)
- Torque wrench (precise tightening)
- Wire cutters/strippers (for cable adjustments)
- Multimeter (to verify voltage)
- Zip ties or rubberized straps (for securing)
- Dielectric grease (to prevent corrosion)
- Lithium-specific charger (like Vatrer'48V smart charger)
- Cleaning supplies (damp cloth, soft brush)
- Safety gear: insulated gloves, safety goggles
- Optional: State of Charge (SOC) meter for charge monitoring
Safety starts with powering down the cart. Remove the key and flip the tow/run switch to tow mode (often under the seat or near the battery compartment) to cut electrical flow. Work in a well-ventilated area, away from sparks or open flames, and store batteries in their original packaging below 86°F until installation. Review your cart's manual for wiring or compartment specifics, and double-check battery compatibility (voltage, size) to avoid issues. If unsure, consult a technician or the battery manufacturer.
Here's a preparation checklist with unique tips to keep you organized. With everything ready, let's move to the installation steps.
| Item | Purpose | Pro Tip |
|---|---|---|
| Torque Wrench | Ensures precise terminal tightening | Set to 5-7 ft-lbs per battery specs |
| Spill Kit (Baking Soda) | Neutralizes acid residue from old batteries | Keep in a sealed bag nearby |
| Ventilation Fan | Maintains safe airflow | Use a portable fan for indoor work |
| Vatrer Battery Manual | Provides specific wiring guidance | Download from Vatrer’s website |
Step-by-Step Guide to Install Lithium Battery in Golf Cart
Now it's time to install lithium battery in golf cart. Follow these steps carefully, referring to your cart and battery manuals for model-specific details to ensure a seamless upgrade.
Step 1: Power Down the Golf Cart
Start by turning off the cart. Remove the key from the ignition and set the tow/run switch to tow mode (check your manual for its location). Confirm that lights, accessories, and signals are off to eliminate electrical risks.
Step 2: Remove Old Lead-Acid Batteries
Open the battery compartment and disconnect cables, starting with the negative (black) terminal to prevent sparks. Use a wrench to loosen bolts, then gently pull cables free. Lift batteries out carefully—they're heavy (200+ lbs), so use proper lifting technique or get a helper. Place them in a leak-proof container and recycle at a certified center (such as auto shops or hazardous waste facilities), as lead and acid are hazardous and illegal to discard in regular trash.
Step 3: Prepare the Battery Compartment
Inspect the compartment for corrosion, dirt, or loose wires. Clean with a damp cloth (avoid water near electronics) and a soft brush for stubborn residue, then dry thoroughly. A clean space prevents interference with your new lithium battery.
Step 4: Position the Lithium Battery
Carefully place the lithium battery (like Vatrer golf cart battery) in the compartment, aligning terminals for easy cable access per the manual. Ensure a snug fit without forcing. For multi-battery packs, space them evenly to allow airflow and prevent overheating.
Step 5: Connect Cables and Terminals
Apply a thin layer of dielectric grease to terminals to resist corrosion. Connect the positive (red) cable first, tightening to 5-7 ft-lbs using a torque wrench (check battery specs). Follow with the negative (black) cable. If your setup requires a voltage converter for 12V accessories, install it now per its instructions. Double-check polarity to avoid damaging the battery or cart.
Step 6: Secure the Battery
Fasten the battery with battery manufacturer-recommended straps or rubberized brackets to prevent movement during drives. Test stability with a gentle shake, tighten if needed, but avoid over-tightening to prevent stress on the pack. Rubberized mounts help absorb vibrations on rough terrain.
Step 7: Install Additional Components
Connect the BMS to monitor battery health, ensuring all wiring follows the manufacturer's guide. Install an SOC meter on the dash for real-time charge tracking. If your current charger isn't lithium-compatible, upgrade to one like the Vatrer lithium charger with auto-shutoff to protect the battery during charging.
Step 8: Test and Verify Your Lithium Battery Installation
Check all connections for tightness, then use a multimeter to confirm voltage matches the battery’s rating (like 36V or 48V). Turn the cart on, test lights and accessories, and take a short test drive to evaluate acceleration, hill performance, and handling. Monitor the BMS for error codes (such as “cell overvoltage” or “high temperature”) and address any issues immediately. If everything checks out, close the compartment securely.
Charging and Maintaining Your Lithium Golf Cart Battery
Here are some simple yet effective tips for installing and maintaining lithium batteries in golf carts. Proper care will help ensure your lithium batteries provide years of reliable performance.
Use a lithium-specific charger, like Vatrer lithium charger with auto-shutoff, to prevent overcharging. Charge after each use, keeping the battery above 20% to avoid deep discharges that reduce cycle life. For example, if you play weekly rounds (10-15 miles), inspect terminals every 1-2 months for looseness or corrosion; clean with a soft brush and reapply dielectric grease if needed. For daily users (like community transport), check monthly to catch issues early.
Store your cart in a cool, dry place (below 86°F) to protect golf cart battery health. The BMS will alert you to issues like temperature spikes or cell imbalances—consult the manual for specific error codes and solutions. A regular maintenance schedule looks like this:
- Weekly: Charge after use; check for loose straps.
- Monthly: Inspect terminals and BMS alerts.
- Yearly: Verify voltage and test full charge cycle.
- This routine maximizes your battery's 8-10 year lifespan.
Troubleshooting Common Issues When Installing Lithium Batteries in Golf Cart
After installing lithium batteries in golf cart, you might run into a few hiccups, but most are easy to fix with simple checks. Here are some common things to keep in mind and solutions to common problems when installing a lithium-ion battery:
- Cart Won't Start: If your golf cart doesn't power on, check for loose or swapped cables. Ensure the positive (red) and negative (black) cables are correctly connected to their terminals. A multimeter should show the battery's rated voltage. If the reading is low, tighten connections or inspect for damaged cables.
- Charging Problems: If the battery isn't charging or charges slowly, verify that you're using a lithium-specific charger. Lead-acid chargers can trigger errors or fail to charge fully. Check the Battery Management System (BMS) for error codes like “overcurrent” or “charger mismatch.” Ensure the charger’s voltage and amperage match the battery’s specs.
- Overheating Issues: If the battery feels warm or the BMS signals a “high temperature” alert (above 140°F), ensure proper airflow in the compartment. Clear any debris blocking ventilation and let the system cool for 30 minutes before retesting. Persistent overheating may indicate a BMS fault or overloaded circuit—consult the battery manual or a technician.
- Weak Performance During Test Drive: If the cart feels sluggish or struggles on hills, check for loose brackets causing battery movement, which can disrupt connections. Inspect the compartment for debris or corrosion affecting terminals. A BMS “cell imbalance” error suggests uneven cell voltages—recheck connections or contact the battery manufacturer for guidance.
- BMS Error Codes: The BMS may display codes like “cell overvoltage” (one cell exceeds safe limits) or “low voltage” (indicating a weak cell). Refer to the battery manual for specific codes and solutions, such as rebalancing cells or replacing a faulty module.
Here's a quick reference for common issues and fixes:
| Issue | Likely Cause | Solution |
|---|---|---|
| No Power | Loose/swapped cables | Verify polarity; tighten to 5-7 ft-lbs |
| Slow/No Charging | Incompatible charger | Use lithium-specific charger |
| Overheating | Blocked airflow or BMS fault | Clear vents; check BMS for "high temperature" code |
| Sluggish Performance | Loose brackets or debris | Secure battery; clean compartment |
| BMS Errors | Cell imbalance or overvoltage | Consult manual; contact manufacturer support |
These steps should resolve most issues when you install lithium battery in golf cart. If problems persist, a professional technician can provide further insight.
Ready to Install Lithium Batteries in Your Golf Cart Today?
You're now ready to install lithium batteries in golf cart, from picking the right battery to testing your upgraded ride. This switch delivers longer drives, faster charging, and less upkeep, making your golf cart more reliable and enjoyable. With the right tools and these steps, DIY installation is achievable for most owners.
If you're considering upgrading your golf cart lithium battery, learn more about Vatrer batteries. Our batteries utilize Grade A cells, feature a built-in 200A-300A battery management system, and feature a shock-resistant design to effectively improve golf cart performance. Start upgrading today and enjoy a smoother, more environmentally friendly ride.
FAQs
Can I mix lithium and lead-acid batteries in my golf cart for a hybrid setup?
Mixing lithium and lead-acid batteries is not recommended due to their different voltage profiles and charging requirements. Lithium batteries maintain a consistent voltage, while lead-acid voltages drop as they discharge, causing imbalances in a hybrid setup. This can overload the BMS, damage batteries, or strain the cart's controller, leading to reduced performance or failure. For a successful upgrade when installing lithium batteries in golf cart, replace all lead-acid batteries with a fully lithium setup.
Can I install a lithium battery in my golf cart without modifying the electrical system?
Yes, in most cases, you can install lithium battery in golf cart without major electrical system modifications, provided the battery matches your cart's voltage and fits the compartment. If your cart uses a custom controller, consult the manufacturer or a technician to ensure compatibility, as some older systems may need firmware updates to handle lithium's consistent voltage output. Always verify wiring configurations to avoid overloading circuits.
Confirm your cart's voltage and accessory needs before purchasing. If a voltage converter is required, install it during the battery setup (as outlined in Step 5 of the guide) and test with a multimeter to ensure proper output.
How do I know if my golf cart's controller is compatible with a lithium battery?
Golf cart controllers manage power delivery, and most modern ones (designed for 36V or 48V systems) are compatible with lithium batteries due to their similar voltage profiles. However, older controllers or those tuned for lead-acid batteries may struggle with lithium's steady voltage output, potentially causing erratic performance or error codes. To check compatibility, review your cart's manual for controller specs or contact the manufacturer.
Test the controller post-installation during the test drive (Step 8). If the cart hesitates or displays errors, consult a technician to assess the controller.
What should I do if my golf cart's range is shorter than expected after installing a lithium battery?
If your range is lower than anticipated, several factors could be at play. First, verify that the battery capacity matches your usage. Check for high-draw accessories draining the battery faster. Environmental factors like cold temperatures (below 32°F) can reduce lithium battery efficiency by 10-20%. Finally, ensure the BMS isn't limiting output due to an error (like “low voltage” or “cell imbalance”)—check the manual for codes.
Recalculate your range needs based on terrain and load. Limit high-draw accessories and charge in a temperature-controlled environment. If BMS errors persist, contact the lithium battery manufacturer for diagnostic help or cell rebalancing instructions.
How can I safely store my golf cart with a lithium battery during long periods of inactivity?
Lithium batteries are more resilient than lead-acid for long-term storage, but proper care prevents capacity loss or damage. Store the cart in a cool, dry place (50-77°F is ideal, avoid exceeding 86°F) to minimize self-discharge, which is low for lithium (1-2% per month). Keep the battery at 50-60% charge to avoid deep discharge, as fully draining can stress cells. Disconnect the battery if storing for over 3 months to prevent parasitic drain from accessories.
Before storage, charge the battery to ~60% using a lithium-specific charger. Inspect connections monthly and top off the charge every 2-3 months to maintain health. Refer to your battery manual for model-specific storage tips to ensure longevity during off-seasons.
Share


