Why Your RV Battery Drains When Nothing Is On: 7 Fixes
Reading time: 17 minutes
Share
A connected RV battery can still lose power even when every light, fan, water pump, and appliance looks off. Many RVs keep small 12V loads running in the background, and those loads can range from a few hundred milliamps to several amps. A steady 1-amp draw uses 24Ah in one day, so a 100Ah battery can lose a large part of its charge during a weekend of storage without anything obvious running.
That hidden draw is usually the real reason behind RV battery draining complaints. The battery may not be defective. The RV may simply have LP detectors, CO detectors, stereo memory, control boards, USB ports, or an inverter still pulling power.
A little drain is normal. Fast drain is not. An RV battery draining overnight, going low after one or two parked days, or turning into an RV battery dead after storage problem needs a step-by-step check.
Is It Normal for an RV Battery to Drain When Nothing Is On?
Some battery drain is normal because an RV is never fully “off” unless the battery is truly disconnected. Safety devices and memory circuits can stay awake all day and night.
A healthy battery should not drop hard overnight with only small standby loads connected. A small voltage change after one night is expected. A battery falling from full to low overnight points to a larger parasitic draw, an inverter left on, a charging problem, or a weak battery with reduced capacity.
Normal vs Problem RV Battery Drain
| Drain pattern | Typical time frame | What it usually suggests | What to check first |
|---|---|---|---|
| Slight voltage drop | 8–12 hours | Normal standby loads | CO/LP detector, stereo memory, small control boards |
| 10–25Ah used overnight | 8–12 hours | Inverter standby, furnace fan cycles, fridge control load, or several small loads combined | Inverter, furnace thermostat, refrigerator, USB ports |
| Battery low after parking | 1–3 days | Hidden 12V load or battery disconnect switch not cutting all circuits | Disconnect switch, aftermarket accessories, compartment lights |
| Battery flat during storage | 1–2 weeks | Continuous parasitic draw, old battery, or no maintainer | Battery age, parasitic draw test, maintainer setup |
| Battery drops while plugged in | Same day or overnight | Converter/charger not charging correctly | Shore power, converter, fuse, breaker, charger profile |
The useful takeaway is the speed of the drain. A few small background loads can slowly pull a battery down over days or weeks. A battery that drops hard in one night needs a deeper check.


Why “Nothing Is On” Still Draws Battery Power
In an RV, “off” often means “not being actively used.” It does not always mean the circuit is disconnected from the battery.
Your home feels different because a wall switch usually controls a single fixture. An RV has safety systems, control boards, and convenience circuits designed to stay connected. Some are there for good reasons. Some are just easy to forget.
Common hidden loads include:
- LP gas detector: This safety device often stays connected to the 12V battery. It can draw power 24/7 because propane detection needs to work even when you are not using appliances.
- CO detector: Carbon monoxide detectors may remain powered outside the main appliance switches. Do not disable them while the RV is occupied or in use.
- Stereo memory and clock: The radio may look off while still saving presets, clock settings, and memory.
- Refrigerator control board: An absorption fridge running on propane can still need 12V power for the control board. A residential-style 12V refrigerator can draw much more because the compressor cycles throughout the day.
- Thermostat and furnace controls: A propane furnace still uses electricity. The thermostat, control board, and blower fan all run from 12V battery power.
- USB ports and 12V sockets: A charger, adapter, router, camera, or small plugged-in device can stay awake even when nothing looks active.
- Monitor panels and boosters: Battery monitors, tank panels, antenna boosters, leveling system memory, and aftermarket accessories can add small but constant loads.
Common Hidden RV Loads and Their Battery Impact
| Hidden load | Typical draw range | Energy used in 24 hours | Why it matters |
|---|---|---|---|
| LP/CO detector | 0.05–0.20A | 1.2–4.8Ah | Small draw, always on for safety |
| Stereo memory/clock | 0.02–0.10A | 0.5–2.4Ah | Easy to overlook during storage |
| Control board or monitor panel | 0.05–0.30A | 1.2–7.2Ah | Multiple panels can add up |
| USB port or small adapter | 0.05–0.50A | 1.2–12Ah | Some ports stay powered all the time |
| Inverter standby | 0.5–4A | 12–96Ah | Can drain a battery fast even with no appliance running |
| Furnace blower while running | 7–10A | 7–30Ah depending on runtime | Propane heat still needs battery power |
A single LP detector will not usually kill a healthy RV battery overnight. An inverter left on, a few USB devices, a control panel, and an old battery together can make the same RV feel like it has an electrical problem.
Fix 1: Find Hidden 12V Loads
Start with the loads that are easy to see, easy to forget, and easy to turn off.
Open storage bays and check every small light. A compartment light left on can drain more power than a detector because it may run for hours without anyone noticing. Look at step lights, porch lights, basement lights, and small LED strips near storage doors.
Next, check the low-voltage accessories that stay plugged in because they feel harmless.
- USB chargers: Remove phone chargers, USB-C adapters, dash chargers, and small power bricks from 12V sockets. A single adapter may only pull a small amount, but several adapters can create a steady drain.
- Antenna booster: Many RV antenna boosters have a small indicator light. Turn it off when the TV system is not being used.
- Tank monitor panel: Some panels wake up only when pressed. Others stay partially powered. A stuck or aftermarket monitor can pull more than expected.
- Aftermarket electronics: Backup cameras, GPS trackers, WiFi routers, security devices, upgraded stereos, and dash cams are common causes when an RV battery keeps draining after everything factory-installed appears off.
- Fridge and thermostat controls: Check whether the refrigerator is actually off, not just set to propane. Confirm the thermostat is not calling for furnace cycles at night.
Safety devices need a different approach. LP and CO detectors should remain active when the RV is occupied. During long storage, follow the RV manufacturer’s guidance before disconnecting any safety circuit.
Fix 2: Turn Off the Inverter
The inverter deserves its own check because it can drain a battery while looking like it is doing nothing.
A microwave, TV, coffee maker, or laptop charger may be off, but the inverter can still sit in standby mode waiting to make 120V AC power. That standby state uses battery power. Smaller inverters may idle around 0.5–1.5 amps. Larger 2000W–3000W inverters can draw 2–4 amps at idle.
At 3 amps, the inverter alone uses 24Ah in 8 hours. That is enough to make a modest RV battery bank look weak by morning.
Shut the inverter down from the main switch, not just from the appliance. Some RVs also have a remote inverter panel, so check both the physical inverter and the wall-mounted control.
A quick habit helps: leave the inverter off until you actually need 120V power. Most overnight basics, such as LED lights, water pump use, phone charging from DC ports, and safety detectors, do not require an inverter.
High-draw 120V appliances are a different issue. Running an air conditioner, microwave, toaster, coffee maker, or hair dryer through an inverter is not parasitic drain. That is heavy battery use. A standard RV battery bank can lose power very quickly under those loads.
Fix 3: Use the Battery Disconnect Switch
A battery disconnect switch helps reduce storage drain, but it may not shut down every circuit in the RV.
Many owners assume the disconnect switch makes the RV electrically dead. The switch usually cuts many house loads, yet some circuits may bypass it by design or through later modifications.
Common bypass loads include:
- Safety circuits: LP detectors, CO detectors, and emergency-related circuits may stay connected depending on the RV design.
- Solar charge controller: A solar controller may remain wired to the battery so it can maintain charging during storage.
- Emergency breakaway switch: Travel trailers often have a breakaway system connected for towing safety.
- Memory circuits: Radio memory, alarm systems, or small control modules may still receive power.
- Aftermarket accessories: A previous owner or installer may have wired a camera, stereo, tracker, or USB outlet directly to the battery terminals.
A disconnect switch is still useful. Use it during storage, then monitor battery voltage or state of charge over the next 24–48 hours. A battery that continues dropping after the disconnect switch is off likely has a bypass load, a weak battery, or a wiring issue.
Longer storage may call for disconnecting the negative battery cable. Check the RV manual first, especially with solar controllers, alarms, and safety circuits. Randomly removing cables without knowing the system layout can create new problems.
Fix 4: Test for Parasitic Draw
A parasitic draw test shows whether power is leaving the battery after visible loads are turned off. This is the practical answer to how to find parasitic draw in RV systems.
The goal is not to guess. The goal is to measure, then isolate the circuit.
Charge the Battery First
Charge the RV battery fully before testing. A battery that starts at 60% can look like it is draining fast when it was never full.
A resting, fully charged 12V lead-acid battery usually reads about 12.6–12.8V after surface charge settles. Around 12.2V is roughly near 50% state of charge for many lead-acid batteries. Readings near 12.0V or lower show the battery is already low.
A 12V LiFePO4 battery behaves differently. Its voltage curve stays flatter through much of the discharge range, so voltage alone is not a precise state-of-charge gauge. A battery monitor or app reading is more useful.
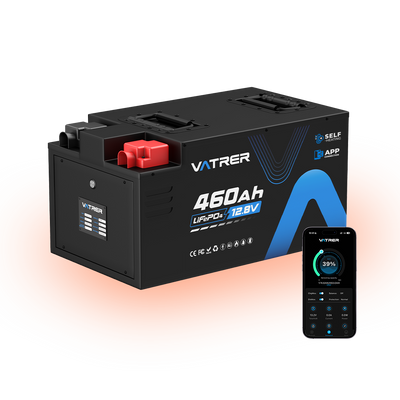
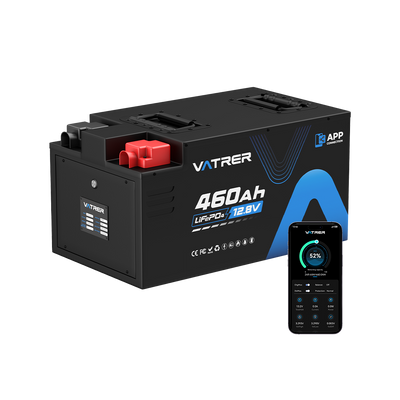
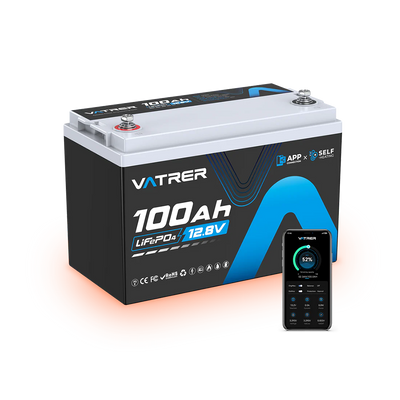
Vatrer lithium RV batteries support app-based remote monitoring, so you can check state of charge, voltage, current, and battery status without guessing from voltage alone. That kind of visibility is helpful when you are trying to confirm whether the RV still has a hidden draw.
Turn Off Visible Loads
Turn off lights, water pump, fan, TV, inverter, furnace, and appliances. Remove USB chargers and 12V accessories.
Walk around the RV once more before testing. Storage bay lights, antenna boosters, step lights, and aftermarket devices are easy to miss because they do not feel like “real appliances.”
Measure Current Draw
Use a DC clamp meter around the battery cable, or use a multimeter in amps mode according to the meter instructions. A clamp meter is easier and safer because it does not require breaking the circuit.
Multimeters can be damaged when used incorrectly for current testing. The test lead must be in the correct amps port, and the meter must be rated for the expected current. A low-range meter setting on a live RV circuit can blow the internal fuse.
A small draw from safety and memory circuits can be normal. A steady draw above 1 amp with everything visible off needs attention. A 2-amp draw uses 48Ah in 24 hours, which can take a big bite out of a 100Ah battery.
Pull Fuses One by One
Pull one fuse at a time from the 12V fuse panel while watching the current reading. Replace each fuse before moving to the next one.
The circuit that causes the current to drop is the circuit pulling power. The fuse label may point to lights, refrigerator, furnace, radio, monitor panel, or accessories.
A badly labeled fuse panel slows the process, but the method still works. Take a photo before you start so each fuse returns to the right spot.
Trace the Circuit
Once the current drops, inspect the devices on that circuit. Look for a light stuck on, a relay that stays energized, a failing detector, a stereo memory wire, or an aftermarket add-on.
Aftermarket wiring deserves extra attention. Accessories wired straight to the battery can bypass the fuse panel, the disconnect switch, and the normal RV controls.
Fix 5: Check the Converter and Charger
Sometimes the battery is not draining fast. It just never charged correctly.
When your RV is plugged into shore power, the converter/charger should take 120V AC power and supply 12V DC power to charge the battery and support the RV’s 12V loads. A failed or misconfigured converter can leave the battery slowly losing charge even while the RV is plugged in.
This is the first place to look when you see RV battery losing charge on shore power.
Common charging problems include:
- Breaker or fuse problem: A tripped breaker or blown fuse can stop the converter from charging while other parts of the RV still appear powered.
- Loose battery terminals: A loose or corroded terminal can interrupt charging current. The converter may be working, but the battery may not receive a full charge.
- Bad ground connection: Poor grounding can create strange voltage readings and weak charging performance.
- Low charger output: A weak converter may not raise voltage enough to charge properly, especially under active 12V loads.
- Wrong charger profile: Lead-acid, AGM, and LiFePO4 lithium batteries need different charging behavior. A lithium RV battery paired with a charger that does not support lithium settings may not charge fully.
- Solar controller issue: A connected solar panel does not guarantee charging. The controller, fuse, wiring, and battery connection still need to work.
Charging System Checks for RV Battery Drain
| Check point | Typical reading or condition | What the result suggests |
|---|---|---|
| Shore power input | 120V AC available at RV | Power is reaching the RV |
| Converter DC output | About 13.2–14.6V depending on charger stage and battery type | Converter is producing charge voltage |
| Lead-acid battery at rest | 12.6–12.8V full after resting | Battery reached full charge |
| 12V LiFePO4 battery at rest | Often around 13.2–13.4V through much of the usable range | Voltage alone is not enough for exact SOC |
| Battery terminal condition | Clean, tight, no corrosion | Charging path is physically sound |
| Fuse and breaker status | No blown fuse, no tripped breaker | Converter circuit is not interrupted |
The converter output matters more than the fact that the RV is plugged in. Shore power can run outlets and still leave the battery undercharged when the converter path has a fault.
Fix 6: Inspect Battery Health and Wiring
An old or damaged battery can look charged, then fall quickly under a small load. That is especially common with lead-acid batteries that have been deeply discharged, stored low, or only partially charged for long periods.
Battery voltage is only one clue. Capacity is the real issue.
A new 100Ah battery should deliver close to its rated capacity under proper conditions. A worn 100Ah lead-acid battery may have only 60–80Ah of real capacity left. Cold weather can reduce available capacity further, especially for lead-acid batteries.
Factory-installed RV battery banks can also be small. A single Group 24 deep-cycle battery is often around 70–85Ah and may weigh about 45–55 lbs. With lead-acid batteries, only about 50% of that capacity is typically used for better cycle life, so the practical usable energy can be closer to 35–42Ah. A few hidden loads and one cold night can drain that faster than expected.
Battery Health Clues by Battery Type
| Battery type | Typical nominal voltage | Practical usable capacity | Typical cycle life range | Common drain-related issue |
|---|---|---|---|---|
| Flooded lead-acid | 12V | About 50% recommended depth of discharge | 300–700 cycles | Capacity loss from sulfation, low storage, deep discharge |
| AGM lead-acid | 12V | About 50% recommended depth of discharge | 400–900 cycles | Holds voltage better than flooded, but still loses capacity with age |
| 12V LiFePO4 | 12.8V | Commonly 80–100% depth of discharge | 4000+ cycles | Hidden loads still drain it, but usable capacity and monitoring are stronger |
A lithium battery does not remove parasitic draw. The RV still needs to be checked. The advantage is that a quality LiFePO4 battery gives you more usable capacity, steadier voltage, and clearer monitoring, which makes drain problems easier to spot before the battery is dead.
Wiring can create the same symptoms as a weak battery.
- Loose terminals: A terminal that moves by hand is too loose. It can cause poor charging, voltage drop, and unreliable readings.
- Corroded cables: White, green, or crusty buildup increases resistance. Clean the connection and inspect the cable end.
- Poor ground: A weak ground can affect both charging and load performance. Check the negative cable path, not just the positive terminal.
- Undersized wire: Large loads need proper cable size. An inverter connected with undersized wiring can create voltage sag and confusing low-voltage shutdowns.
- Damaged lugs: Cracked or poorly crimped lugs can heat up and reduce charging efficiency.
Fix 7: Prevent Drain During Storage
Storage is where small loads become a big problem. A 0.5-amp draw uses 12Ah per day. Over 7 days, that is 84Ah. A battery can be flat by the time you come back, even though nothing looked on when you parked.
This is the classic RV battery dead after storage situation.
Prepare the RV before it sits:
- Charge the battery first: Store the battery from a healthy state of charge. A battery parked low has less room for standby loads and ages faster.
- Turn off the inverter: Do this at the inverter or its remote panel. Standby draw can be much larger than detector or memory loads.
- Switch off non-essential loads: Turn off lights, boosters, monitor panels, entertainment devices, routers, and accessories not needed during storage.
- Unplug small devices: Remove USB chargers, dash cameras, phone adapters, portable fans, and any 12V accessory.
- Use the battery disconnect switch: It reduces many storage loads. Confirm the battery still holds charge over the next few days because some circuits can bypass the switch.
- Check voltage or SOC every 2–4 weeks: More frequent checks help during cold weather or when the RV has known standby loads.
- Use a maintainer for longer storage: A battery maintainer or solar maintainer can offset small draws. Match the maintainer to the battery chemistry.
Lead-acid batteries should not sit deeply discharged. Long low-charge storage encourages sulfation, which reduces capacity and shortens battery life. A monthly voltage check is a reasonable minimum when no maintainer is connected.
Lithium RV batteries should be stored according to the battery manufacturer’s guidance. State of charge, storage temperature, and charger compatibility matter. App monitoring helps because you can see whether the battery is slowly dropping instead of discovering a dead battery weeks later.
Quick Checklist for RV Battery Drain
Use this checklist when your RV battery keeps draining and you want a practical order of attack.
- Charge the battery fully: Start testing from a known full charge. A partially charged battery makes every drain look worse.
- Turn off visible loads: Shut down lights, fan, water pump, TV, appliances, and furnace controls.
- Shut down the inverter: Use the main inverter switch or remote panel. Do not rely on turning off the appliance only.
- Unplug small accessories: Remove USB chargers, 12V adapters, cameras, routers, and portable electronics.
- Check hidden lights: Look at storage compartments, step lights, basement lights, and porch lights.
- Review safety and control loads: LP detector, CO detector, refrigerator control board, thermostat, stereo memory, and monitor panels may still draw power.
- Use the disconnect switch: Turn it off during storage, then confirm whether battery voltage still drops.
- Look for bypass circuits: Solar controllers, breakaway switches, alarms, and aftermarket devices may stay connected.
- Test for parasitic draw: Use a DC clamp meter or multimeter and measure current after visible loads are off.
- Pull fuses one at a time: Watch for a current drop to locate the problem circuit.
- Check converter/charger output: Plugging into shore power does not prove the battery is charging.
- Inspect wiring: Clean terminals, tighten connections, check ground cables, and inspect lugs.
- Test battery capacity: A worn battery can drop quickly even under a normal small load.
- Set up storage charging: Use a battery maintainer, solar maintainer, or proper disconnect plan.
- Upgrade only after diagnosing the drain: A lithium RV battery can give more usable capacity and better monitoring, but a hidden load should still be fixed.
Conclusion
An RV battery can drain with nothing visibly on because several systems may still be connected to the 12V battery. LP and CO detectors, stereo memory, refrigerator controls, thermostat circuits, USB ports, monitor panels, and inverter standby draw can all use power quietly.
Start with the easiest checks. Turn off the inverter. Remove small plugged-in devices. Use the disconnect switch. Then test for parasitic draw, inspect the converter/charger, and check battery health.
A battery that keeps going low after those checks has a real cause. It may be a bypassed circuit, a weak charger, corroded wiring, or a battery that no longer has enough usable capacity for the way you camp. Lithium can be a smart upgrade when capacity, deep cycling, and monitoring are the problem, but the hidden drain still needs to be found first.
Share