How to Keep Your RV Battery Charged When Not in Use
Reading time: 16 minutes

Share
Keep your RV battery charged when not in use by storing it at the right charge level, cutting off hidden 12V loads, and choosing the right maintenance method for where the RV sits. Without a maintainer, check battery status every 2–4 weeks. Lead-acid batteries should go into storage close to full charge, while lithium RV batteries are usually better stored at about 40%–60% SOC for storage longer than 30 days, unless the battery manual gives a different range. Avoid charging lithium batteries below 32°F.
RV battery storage is not just about “keeping a charger plugged in.” A battery can lose power from propane detectors, stereo memory, inverter standby mode, and normal self-discharge. A clean setup is easier to manage: charge the battery, reduce power draw, then use shore power, a smart battery maintainer, solar, or battery removal based on your storage conditions.


Why Your RV Battery Drains When Not in Use
RV battery drain when not in use usually comes from two places: small devices still pulling power and the battery’s own natural self-discharge. The frustrating part is that the RV may look completely off from inside the cabin, while several 12V circuits are still awake.
Parasitic Loads Can Keep Drawing Power
Parasitic loads are small electrical draws that continue after the main appliances are off. One detector or memory circuit may use very little power, but a few of them running for weeks can pull a battery down far enough to cause trouble.
Common hidden loads include:
- Propane and CO detectors: These safety devices often stay powered even when the RV is parked. Their draw is small, but they run 24 hours a day.
- Radio memory and control boards: Stereo presets, monitor panels, appliance boards, and some fridge controls may keep using power in the background.
- Inverter standby mode: An inverter left in standby can drain more power than many owners expect. Turn it fully off during storage.
- USB ports and aftermarket accessories: Added lights, backup cameras, security systems, and USB outlets may bypass the switches you normally use.
A battery disconnect switch helps, but it may not shut off every circuit. Some RVs leave safety devices or memory circuits connected even after the disconnect switch is off.
Self-Discharge Reduces Charge Over Time
A battery also loses charge while sitting, even with every cable disconnected. Lead-acid batteries self-discharge faster than lithium batteries, especially in warm storage conditions.
A flooded lead-acid or AGM battery left partly discharged can develop sulfation. That reduces usable capacity and makes the battery harder to recharge. A lithium battery has a lower self-discharge rate, but it should not sit for months at a very low SOC. Keep it above 20% SOC during storage, and bring it back to about 40%–60% SOC before long-term storage when possible.
Think of storage like leaving water in a bucket with a slow drip. Disconnecting the RV loads plugs the bigger leaks. Self-discharge is the tiny drip that remains, which is why long-term RV battery maintenance still requires checking the battery.
Prepare Your RV Battery Before Storage
The best storage setup starts before the RV is parked. A weak battery, corroded terminal, loose cable, or low water level will not improve just because the RV is sitting.
Check the Battery Charge First
Check the battery SOC before storage using a reliable monitor. A basic RV panel may only show rough levels, so a multimeter, battery monitor, LCD display, or Bluetooth app gives you better information.
Lithium batteries need extra care when reading voltage. A 12V LiFePO4 battery has a flatter voltage curve than a lead-acid battery, so voltage alone may not show the real SOC clearly. Use the battery’s app or display when available.
Charge It to the Right Level
Lead-acid and lithium batteries do not share the same storage habits. A lead-acid battery likes to be stored near full charge. A lithium RV battery is usually better stored at about 40%–60% SOC when it will sit unused for more than 30 days. Do not leave a lithium battery at 0%–10% SOC for storage, and do not keep it at 100% SOC for months unless the battery manual specifically recommends that.
RV Battery Storage Starting Points
| Battery Type | Common 12V Resting Voltage Reference | Recommended Storage Charge | Check Interval Without Maintainer | Main Storage Risk |
|---|---|---|---|---|
| Flooded lead-acid | About 12.6V–12.8V when full | 90%–100% SOC | Every 2–4 weeks | Sulfation, water loss, freezing risk |
| AGM | About 12.7V–12.9V when full | 90%–100% SOC | Every 3–4 weeks | Undercharging or overcharging |
| 12V LiFePO4 | About 12.8V nominal, voltage curve is flat | 40%–60% SOC for storage over 30 days; keep above 20% SOC | Every 1–3 months | Very low SOC, low-temperature charging |
Lead-acid batteries should not be stored low, and lithium batteries should not be judged by voltage alone. A battery monitor or app gives you a cleaner picture than guessing from the RV wall panel.
Inspect Terminals, Cables, and Water Levels
Storage is a good time to check the physical battery setup. Corrosion and loose terminals can block proper charging and create voltage drop later.
Use this quick inspection before the RV sits:
- Terminals: Clean white, green, or blue corrosion from battery posts and cable ends. Reconnect terminals tightly, but do not overtighten them.
- Cables: Look for cracked insulation, loose lugs, or heat marks. A damaged cable can cause poor charging and unreliable 12V power.
- Flooded lead-acid water level: Check electrolyte levels before and during storage. Add only distilled water when the plates need coverage.
- Battery case: Look for swelling, cracks, leaks, or unusual odor. A damaged battery should not go into long-term storage.
Disconnect RV Battery Loads Before Storage
A fully charged battery can still die in storage when hidden loads stay connected. Disconnecting loads is the next step after charging and inspection.
Short-Term Storage
A battery disconnect switch works well for short breaks between trips. It usually cuts many 12V circuits and slows battery drain during a few days or a few weeks of parking.
The switch is not a guarantee of zero power draw. A propane detector, radio memory, or control circuit may remain connected depending on how the RV is wired. A quick battery monitor check after 24–48 hours can show whether the battery is still dropping faster than expected.
Long-Term Storage Without Charging
Long storage with no charging source needs a stronger approach. Disconnecting the battery cables isolates the battery from RV loads more completely than the interior switch.
Handle the cables carefully:
- Disconnect the negative cable first: This lowers the chance of accidental shorting while working around the battery terminals.
- Take a photo before removing wires: RV battery compartments can have several cables on one post. A photo saves trouble during reinstallation.
- Label positive and negative cables: Clear labels reduce the risk of reverse connection when the RV comes out of storage.
- Cover loose cable ends: Keep them away from metal surfaces and battery posts.
- Use a technician when unsure: Battery terminals can arc, and wrong connections can damage RV electronics.
Turn Off the Inverter Completely
An inverter can be one of the easiest drains to miss. Many RV owners turn off the appliances plugged into the inverter but leave the inverter itself in standby.
Shut the inverter down at the unit or main control panel. Then check USB ports, aftermarket lights, security cameras, and other accessories that may not be controlled by the RV’s main switches.
Choose the Best Way to Keep Your RV Battery Charged in Storage
The right method depends on where the RV is parked. Shore power is easy at home. Solar works outdoors. Battery removal makes sense when the RV sits in covered storage with no outlet.
Best RV Battery Storage Method by Parking Situation
| Storage Situation | Best Method | Typical Power Source | Typical Cost Range | Check Interval |
|---|---|---|---|---|
| Home driveway with outlet | Smart maintainer or shore power | 15A household outlet | $40–$150 for maintainer | Every 2–4 weeks |
| Storage facility with hookup | Shore power with smart converter/charger | 30A or 50A RV hookup | Usually included or facility fee | Monthly |
| Outdoor storage with sun | Solar maintainer with charge controller | 10W–100W solar panel | $40–$250 | Every 2–4 weeks |
| Covered storage with no power | Remove battery and use maintainer at home | 120V household outlet | $40–$150 for maintainer | Every 2–4 weeks |
| Long-term parking with no charging source | Fully disconnect battery cables | No active charging | $0–$20 for terminal covers/tools | Every 2–4 weeks |
Shore power and smart maintainers are the most stable choices when outlet access is available. Solar is useful only when the panel gets steady sun. Full disconnection reduces drain, but it does not stop self-discharge.
Use Shore Power Only With the Right Charger
Shore power can keep an RV battery charged during storage, but the charger behind it matters. A modern smart converter/charger can adjust charging stages and reduce overcharging risk. A basic older converter may keep pushing voltage longer than the battery needs.
A 15A household outlet can maintain batteries when you are not running large RV loads. A 30-amp or 50-amp hookup gives more available power, but storage charging itself usually needs far less than full hookup capacity.
Flooded lead-acid batteries need closer attention when plugged in for months. Check water level every month and top off with distilled water when needed. Lithium RV battery users should confirm the converter or charger has a lithium charging profile.
Use a Smart Battery Maintainer for Long-Term Storage
A smart battery maintainer is one of the cleanest tools for RV battery storage. It monitors battery voltage and adjusts output instead of sending a constant charge for weeks.
Choose one that matches your battery chemistry. A maintainer made only for flooded lead-acid batteries may not be right for AGM or lithium batteries. A lithium battery maintainer should support the correct LiFePO4 charging profile.
Avoid old trickle chargers for long storage. A basic trickle charger may keep feeding current after the battery is full, which can dry out flooded lead-acid batteries or stress the battery over time.
Use Solar When the RV Is Stored Outdoors
A solar maintainer can offset self-discharge and small parasitic loads when the RV is parked in steady sunlight. It is especially useful in an open driveway, outdoor storage lot, or seasonal campsite.
A small 10W–20W solar maintainer can help maintain a battery, but it will not quickly recover a deeply discharged battery. Larger 50W–100W panels provide more useful charging for storage, especially when weather and sun angle are not ideal.
Every solar setup needs a charge controller. Some small solar maintainers include one, but a bare panel connected straight to a battery is not the right setup for long storage. The controller helps prevent overcharging and keeps voltage within a safer range.
Solar wiring also needs a quick check. On some RVs, the solar controller still charges the battery when the battery disconnect switch is off. On others, the disconnect switch may interrupt the charging path.
Remove the Battery When There Is No Power or Sunlight
Covered storage creates a different problem. The RV may be protected from weather, but the battery has no shore power and no solar input. Removing the battery is often easier than trying to maintain it inside the RV.
Store the battery in a cool, dry, ventilated area. A garage or utility space works better than a damp shed or hot enclosed compartment. Flooded lead-acid batteries should not be kept in living areas because they can release gas during charging.
Connect the removed battery to a compatible battery tender or smart maintainer. Take a photo of the wiring before removal, label the cables, and keep terminal covers on the battery posts during transport and storage.
Store Lead-Acid, AGM, and Lithium RV Batteries Correctly
Battery chemistry changes the right storage routine. This is where many RV battery maintenance mistakes happen.
RV Battery Type Comparison for Storage
| Battery Type | Typical 100Ah Weight | Typical 100Ah Price Range | Typical Cycle Life | Recommended Storage Focus |
|---|---|---|---|---|
| Flooded lead-acid | 55–70 lbs | $120–$250 | 300–500 cycles at about 50% DOD | Store near full charge, check water |
| AGM | 60–75 lbs | $200–$400 | 500–800 cycles at about 50% DOD | Store near full charge, avoid wrong charger |
| LiFePO4 lithium | 22–32 lbs | $300–$700 | 3,000–5,000+ cycles at 80%–100% DOD | Store at 40%–60% SOC for 30+ days; keep above 20%; avoid low-temp charging |
Lithium batteries cost more up front, but they weigh about 30–50 lbs less per 100Ah battery than many lead-acid options and usually offer far more cycles. Lead-acid batteries remain common, but they need tighter storage habits.
Flooded Lead-Acid Battery Storage
A flooded lead-acid battery should be stored close to full. Low charge allows sulfation to build up on the plates, and that lost capacity may not fully come back.
RV battery winter storage is harder on lead-acid batteries when they are discharged. A full lead-acid battery tolerates cold far better than a low battery. Check water levels monthly during long storage, especially when the battery stays connected to shore power or a maintainer.
Clean terminals before storage and again before the next trip. Corrosion raises resistance, which can make charging slower and 12V equipment less reliable.
AGM Battery Storage
AGM batteries are sealed and cleaner to maintain than flooded lead-acid batteries. No watering is needed, and they handle vibration well.
They still need the right charge profile. Long-term undercharging can reduce capacity, while overcharging can damage the sealed design. A smart maintainer with an AGM mode is a better fit than an old trickle charger.
Store AGM batteries near full charge and check them every 3–4 weeks without a maintainer. A healthy AGM battery should not be left deeply discharged through an off-season.
Lithium RV Battery Storage
Lithium RV batteries self-discharge slowly and are easier to store than lead-acid batteries. For storage longer than 30 days, set a LiFePO4 RV battery to about 40%–60% SOC before disconnecting it, unless the battery manual gives a different storage range. Keep it above 20% SOC during storage, because a battery left very low for a long period may enter BMS protection or become harder to wake up.
Do not use a lead-acid storage habit blindly. A lithium battery does not need to sit at 100% for months. After the RV season ends, charge or discharge the battery to the 40%–60% range, turn off unnecessary loads, and check SOC through the app, display, or battery monitor every 1–3 months.
Low-temperature charging is the main cold-weather concern. Many lithium batteries should not charge below 32°F unless they have low-temperature protection or a self-heating system.
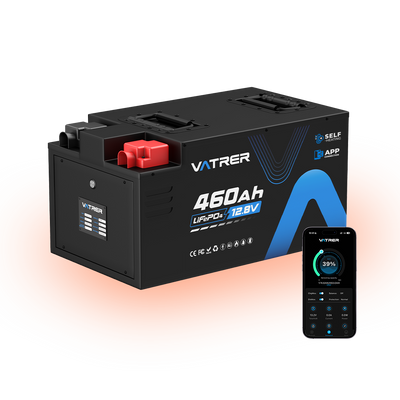
Vatrer lithium RV batteries are built with an internal BMS designed to help protect against overcharge, over-discharge, overcurrent, high temperature, and low-temperature cut-off conditions. That matters during storage because a battery sitting unattended needs protection from both electrical mistakes and temperature changes.
The app monitoring also helps with storage checks. Instead of opening the battery compartment every time, you can view SOC, voltage, temperature, and battery status through the app on supported Vatrer RV batteries.
How Often Should You Check an RV Battery in Storage?
Checking frequency depends on battery type, storage temperature, and whether a maintainer is connected. A battery stored with no charger needs more attention than one connected to a smart maintainer.
RV Battery Storage Check Schedule
| Storage Setup | Battery Type | Suggested Check Interval | What to Check |
|---|---|---|---|
| No maintainer, battery left in RV | Lead-acid or AGM | Every 2–4 weeks | SOC, voltage, hidden loads, terminals |
| No maintainer, battery disconnected | Lead-acid or AGM | Every 3–4 weeks | Voltage, terminal condition |
| No maintainer, lithium battery disconnected | LiFePO4 | Every 1–3 months | SOC, app status, temperature; recharge to 40%–60% if SOC drops near 20% |
| Smart maintainer connected | All compatible types | Monthly | Charger status, cable connection, battery temperature |
| Solar maintainer connected | All compatible types | Every 2–4 weeks | Panel shade, snow, dust, controller status |
| Flooded lead-acid on shore power | Flooded lead-acid | Monthly | Water level, charging status, corrosion |
A monthly check catches most problems before the battery goes flat. Solar systems need visual checks because shade, dust, leaves, and snow can drop output to near zero.
Look at more than voltage. Terminals, cable tightness, charger lights, solar controller status, and battery temperature all matter. A lithium battery app can make this easier by showing SOC and temperature directly.
Common RV Battery Storage Mistakes to Avoid
Storage problems usually come from small oversights. They are easy to prevent once you know where they start.
- Storing the battery low: A low lead-acid battery can sulfate, and a lithium battery stored below 20% SOC for a long period can eventually enter protection mode. Charge lead-acid batteries close to full before storage, and set lithium batteries around 40%–60% SOC for storage longer than 30 days.
- Assuming “off” means no draw: RV lights and appliances may be off while detectors, memory circuits, or the inverter still draw power. Watch battery status after the first day of storage.
- Trusting only the disconnect switch: The disconnect switch may not isolate every circuit. Long storage without charging may require full cable disconnection.
- Using the wrong charger: Flooded lead-acid, AGM, and lithium batteries need different charging profiles. A mismatched charger can undercharge, overcharge, or stop charging too early.
- Leaving an old trickle charger connected: A non-smart trickle charger can overcharge a battery during months of storage. Use a smart maintainer instead.
- Ignoring water levels: Flooded lead-acid batteries can lose water during charging. Check monthly and add distilled water when needed.
- Charging lithium below freezing: Lithium charging below 32°F can damage cells unless the battery has low-temperature protection or self-heating.
- Letting solar panels sit covered: A solar maintainer will not help under snow, heavy dust, a roof cover, or tree shade. Check the panel, not just the battery.
RV Battery Storage Checklist Before Your Next Trip
Use this checklist when parking the RV and again before the next trip.
- Charge before storage: Bring lead-acid and AGM batteries close to full charge. Set lithium RV batteries to about 40%–60% SOC for storage longer than 30 days, unless the manual specifies another range.
- Check battery condition: Look at SOC, voltage, terminals, cables, case condition, and any signs of corrosion.
- Service flooded lead-acid batteries: Check electrolyte level and use distilled water when needed. Do not overfill before charging.
- Turn off 12V loads: Shut down lights, fans, water pump, fridge controls, USB ports, and accessories.
- Shut down the inverter: Turn it fully off rather than leaving it in standby mode.
- Use the disconnect switch for short storage: It helps reduce draw between trips, but it may not isolate every circuit.
- Disconnect cables for long storage without charging: Remove the negative cable first, label wires, and cover loose cable ends.
- Use shore power with the right charger: Confirm the converter/charger is suitable for long-term battery maintenance.
- Choose a smart maintainer for outlet access: Match the maintainer to flooded lead-acid, AGM, or lithium chemistry.
- Use solar only with steady sunlight: Add a charge controller and check for shade, dust, leaves, or snow.
- Remove the battery when no power is available: Store it in a cool, dry, ventilated place and connect a compatible battery tender.
- Protect lithium batteries from low-temperature charging: Low-temperature protection and self-heating are worth considering for cold storage.
- Check status every 2–4 weeks without a maintainer: Lithium batteries can often go longer, but app or display checks every 1–3 months are still useful.
- Recharge lithium before it gets too low: Bring it back to about 40%–60% SOC if storage SOC drops near 20%.
- Confirm everything before travel: Reconnect cables correctly, verify charge level, and test 12V equipment before loading the RV.
A stored RV battery stays healthier when three things are handled together: the battery starts storage at the right charge level, hidden loads are cut off, and the maintenance method matches the storage location. Done well, the battery is ready when the next trip starts instead of needing an emergency charge in the driveway.
Share