Why Is My RV Lithium Battery Only Charging to 80%?
Reading time: 15 minutes

Share
An RV lithium battery only charging to 80% usually points to one of three problems: the converter is using the wrong charging profile, the battery is not receiving the converter’s full output, or the state-of-charge display is wrong.
Older converters often continue to charge a LiFePO4 battery, but they may do it slowly and may never hold the voltage needed near the top of the cycle. Before replacing anything, compare the converter voltage, battery-terminal voltage, charging current, and BMS data. Those readings separate a real charging problem from a bad 80% estimate.
What the 80% Reading May Be Telling You
| What You Notice | Most Likely Area | First Check |
|---|---|---|
| The battery stops near 80% only on shore power | Converter profile or charging voltage | Converter model and operating mode |
| Solar reaches 100%, but shore power does not | Converter output or cable loss | Voltage at the converter and battery |
| The battery app shows full, but the RV panel shows 80% | Inaccurate RV display | BMS app or shunt data |
| Charging stops suddenly in cold weather | BMS low-temperature protection | Battery temperature and fault status |
| The converter reads 14.4V, but the battery reads 13.8V | Wiring resistance | Cables, fuses, grounds, and disconnects |
A shore-power-only problem usually points toward the converter or the wiring between it and the battery. Conflicting SOC readings point toward the monitor instead.


Why an Old RV Converter May Leave a Lithium Battery at 80%
Older RV charging systems were commonly designed around flooded lead-acid or AGM batteries. That does not automatically make them unusable with LiFePO4, but their voltage stages and timing may not match what your lithium battery expects.
Lead-Acid and Lithium Charging Profiles
A basic older converter may spend most of its time between about 13.2V and 13.6V. Some multi-stage lead-acid models can rise to roughly 14.4V in boost mode, then fall back to normal or storage voltage.
Many 12V LiFePO4 batteries use a charging range near 14.2V to 14.6V. The exact target depends on the battery manufacturer and BMS settings.
Typical Charging Voltage Ranges
| Charging Source | Typical Voltage | Expected LiFePO4 Behavior |
|---|---|---|
| Older fixed-output converter | 13.2V–13.6V | Charges the battery, but the upper portion may be very slow |
| Lead-acid converter in boost mode | Around 14.4V | May charge well while boost remains active |
| Lead-acid converter in normal or float mode | About 13.2V–13.6V | Current may fall before the battery reaches its intended full-charge conditions |
| Lithium compatible RV converter | Commonly 14.2V–14.6V | Better matched to a LiFePO4 charging cycle |
| Lead-acid equalization mode | Often above normal charging voltage | May be unsuitable unless the lithium battery manual permits it |
If your converter never rises above 13.6V, it may still charge the battery, but it is less likely to finish the upper part of the cycle quickly or trigger a monitor’s full-charge conditions.
Why Charging Slows Near the Top
Current flows fastest when the converter voltage is clearly higher than the battery voltage. As the battery charges, its voltage rises and the gap becomes smaller. The charging current then begins to fall.
Picture two water tanks connected by a hose. Water moves quickly when one tank has much higher pressure. Flow slows as the pressure becomes similar on both sides. A 13.6V converter can behave the same way with a LiFePO4 battery: useful current flows early, then drops sharply near the top.
Several conditions make that slowdown more noticeable:
- The converter leaves boost mode too early.
- A large battery bank is paired with a low-output converter.
- Lights, fans, control boards, or an inverter consume part of the available current.
- Long or undersized cables reduce voltage at the battery.
- The battery monitor waits for a higher synchronization voltage.
This is why the battery may climb quickly from 30% to 70%, then barely move for hours.
Why 80% Is Not a Fixed Limit
An old converter does not contain a rule that stops every lithium battery at exactly 80%. One RV may level off at 75%, while another eventually reaches 95% after a long shore-power connection.
The result depends on the complete system:
- Converter voltage: A steady 13.6V source behaves differently from a model that holds 14.4V.
- Net charging current: Converter output must cover RV loads before the remaining current reaches the battery.
- Battery capacity: Replacing 20% of a 100Ah battery requires about 20Ah. The same percentage on a 400Ah bank requires about 80Ah.
- Cable loss: The voltage shown at the converter may not be the voltage reaching the battery.
- Monitor settings: An incorrect charged-voltage or tail-current setting can keep the display below 100%.
The 80% figure is a symptom, not a universal charging limit.
What Partial Charging Affects
LiFePO4 batteries do not need to reach 100% after every trip. Regular partial charging is generally acceptable when the battery still provides enough usable capacity.
A system that never reaches its intended upper charging range can still create practical limits:
- Less usable runtime between charges
- Longer generator sessions
- Battery-monitor drift
- Fewer opportunities for top-of-charge cell balancing
- Confusing differences between shore-power and solar charging
Cell balancing does not work the same way in every battery. Some BMS designs begin balancing below full charge, while others become more active near the top. Low converter voltage may reduce balancing time, but it does not prove that balancing has stopped.
Is Your RV Lithium Battery Really at 80%?
A displayed percentage is an estimate. The quality of that estimate depends on the device producing it and how well that device has been configured.
Compare the Available SOC Readings
Your RV may show battery state of charge in several places:
- The original RV control panel
- A Bluetooth battery app
- A shunt-based monitor
- A solar controller
- An inverter/charger display
These devices often disagree because they use different data.
A traditional RV panel usually estimates battery level from voltage. That method works poorly with LiFePO4 because the voltage curve remains fairly flat through much of the usable capacity. A shunt counts current moving into and out of the battery bank. A BMS app reads internal battery data.
If the RV panel shows 80% and the battery app shows 98%, the original panel is usually the weaker reference.
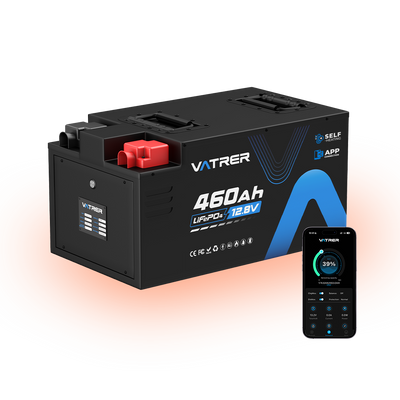
For Vatrer lithium RV batteries that support app connectivity, you can view data such as SOC, current, temperature, total voltage, and individual cell voltage. Comparing that data with your external shunt makes it easier to see whether the battery is still charging or the display has simply lost calibration.
Check Battery Monitor Synchronization
A shunt calculates SOC by tracking amp-hours. Small measurement errors build over time, so the monitor needs a confirmed full-charge event to reset itself to 100%.
Review these settings:
- Battery capacity: The total Ah rating of the connected battery bank
- Charged voltage: The voltage the monitor expects near full charge
- Tail current: The low current threshold used near the end of charging
- Detection time: How long the voltage and current conditions must remain true
- Charge efficiency: The percentage of incoming energy counted as stored energy
- Zero-current calibration: The reading shown when no current is flowing
A common mismatch occurs when the monitor expects 14.2V or higher, but the converter never rises above 13.6V. The battery may be nearly full, yet the monitor never sees the conditions required to reset.
Do not copy settings from another RV without checking your own battery and monitor manuals. Their converter voltage, battery-bank size, and wiring may be different.
Use Voltage as Supporting Evidence
Voltage helps, but it does not provide a precise SOC reading while the battery is charging or powering appliances.
Four readings can look very different:
- Charging voltage: Includes voltage applied by the converter
- Loaded voltage: Drops while appliances draw current
- Resting voltage: Measured after the battery has had time to settle
- Individual cell voltage: Reveals imbalance hidden by the total battery voltage
A battery showing 13.6V on shore power may simply be matching the converter output. That reading alone does not prove the battery is full.
Current adds the missing context. If 8A is still flowing into the battery, charging is still happening even if the percentage has stopped changing.
How to Troubleshoot an RV Converter With Lithium Battery
Use a fixed test order. Changing several parts or settings at once makes the fault harder to identify.
Identify the Converter and Charging Mode
Find the converter brand and model number first. The label may be on the converter chassis, behind the power-center cover, inside the distribution compartment, or in the RV documentation.
Record the following:
- Rated output, such as 35A, 45A, 55A, or 75A
- Published charging voltages
- Lithium or lead-acid selector position
- Manual boost controls
- Automatic battery-type detection
- Replacement-board compatibility
The converter, breaker panel, and DC fuse panel may share one housing, but they are not always one replaceable part. Some power centers let you replace only the converter section.
Disconnect shore power and generator input before opening any electrical compartment. Exposed AC wiring should be handled by a qualified RV technician.
Measure Voltage at Both Ends
Measure the voltage at the converter and at the battery while charging is active.
Use this sequence:
- Connect the RV to shore power.
- Confirm that the converter is running.
- Measure DC voltage at the converter output.
- Measure directly across the battery terminals.
- Record both values.
- Repeat the test after 15 to 30 minutes.
How to Read the Voltage Difference
| Converter Output | Battery Terminals | Likely Condition |
|---|---|---|
| 14.4V | 14.3V–14.4V | Low voltage loss; the charging path looks healthy |
| 14.4V | 13.8V | Excessive cable or connection loss |
| 13.6V | 13.5V–13.6V | Converter may be in normal or float mode |
| 13.6V | About 13.0V | Heavy RV loads, poor wiring, or both |
| Normal voltage | Near-zero charging current | Full battery, open circuit, BMS block, or connection fault |
A difference of several tenths of a volt under charge deserves attention. If the converter produces 14.4V but the battery receives only 13.8V, replacing the converter will not repair the lost voltage.
Check Net Charging Current
Converter output is shared between the battery and every operating 12V device.
Suppose a 30A converter is running:
- Refrigerator controls and standby loads use 3A.
- Lights and fans use 5A.
- An inverter and small electronics draw 4A.
- About 18A remains for charging.
Use a basic estimate:
Charging time ≈ Capacity to replace ÷ Net charging current
A 200Ah battery at 80% is missing about 40Ah.
40Ah ÷ 18A = roughly 2.2 hours under ideal conditions
The real time may be longer because loads change and charging current can fall near the top. If only 5A reaches the battery, replacing the same 40Ah takes at least eight hours.
Turn off nonessential loads during the test. This shows what the converter can supply when the battery receives most of the output.
Inspect Wiring and Connections
Lithium batteries can accept higher current than many older lead-acid batteries. That extra current can expose weak cables and aging connections that previously went unnoticed.
Inspect the full charging path:
- Positive cable
- Negative cable
- Chassis grounds
- Battery terminals
- Fuse holders
- Breakers
- Disconnect switches
- Busbars
- Crimped lugs
- Converter reverse-polarity fuses
A connection may look clean while still creating resistance under load. Check voltage drop while current is flowing. An idle measurement can hide the problem because very little current is moving.
Cable size should match current, total circuit length, insulation rating, and installation conditions. Converter amp rating alone is not enough.
Review BMS and Temperature Status
A working converter cannot force current into a battery when the BMS has disabled charging.
Check the battery app or display for:
- Low-temperature charge protection
- High cell voltage
- Overcurrent protection
- High battery temperature
- Charging MOSFET disabled
- Large cell-voltage differences
- Stored fault codes
Many LiFePO4 batteries restrict charging near or below 32°F. If current falls from 20A to 0A almost instantly in cold weather, the BMS may have opened the charging circuit.
A gradual decline tells a different story. Current that moves from 20A to 8A and then 3A usually points toward voltage matching or normal tapering rather than an abrupt BMS shutdown.
The Vatrer 12V self-heating lithium battery warms the battery before normal charging starts in low temperatures. That feature addresses cold charging, but it cannot correct an incompatible converter profile or undersized wiring.
How to Fix an RV Lithium Battery Stuck at 80%
The correct repair depends on what the measurements revealed. Start with settings and connections before moving to replacement hardware.
Correct the Mode or Monitor Settings
If the converter already supports lithium charging, verify that it is actually using that mode.
Possible corrections include:
- Move the selector switch to lithium.
- Activate manual boost according to the converter instructions.
- Restart an automatic battery-detection cycle.
- Correct the battery capacity entered in the monitor.
- Adjust charged voltage and tail current to match the system.
- Recalibrate zero current.
- Synchronize the monitor after a confirmed full charge.
Change one setting at a time and record the result. That makes the cause visible instead of replacing one unknown with another.
Reduce Voltage Drop and RV Loads
A cable repair can produce more charging improvement than a larger converter.
Work through the low-cost fixes first:
- Clean and tighten battery terminals.
- Repair weak chassis grounds.
- Replace damaged fuse holders or disconnect switches.
- Upgrade undersized charging cables.
- Shorten the converter-to-battery cable run where practical.
- Reduce nonessential 12V loads during generator charging.
Retest converter voltage, battery voltage, and net current after each change. The new readings show whether the repair worked.
Use Solar or an External Charger
A lithium-compatible solar charge controller can finish the upper part of the charge if the old converter cannot. This works best when the RV already has adequate panel capacity and enough usable sunlight.
Solar results depend on:
- Panel wattage
- Shading
- Sun angle
- Controller settings
- Battery capacity
- Current RV loads
Solar does not improve the old converter. It gives the battery another charging source with a better voltage profile.
A portable LiFePO4 AC charger offers a different workaround. It can run from shore power or a generator without modifying the RV power center.
Match the charger to:
- Battery voltage
- Maximum battery charge current
- Cable size
- Fuse rating
- Connector type
- Available AC input
The charging current limits and recommended voltage ranges vary depending on the battery model, so please always refer to the specific product's instruction manual and do not choose an external charger solely based on its rated current.
Replace the Converter Section
A replacement converter board or converter section can keep the existing AC breaker and DC fuse panel in place.
Check these items before ordering:
- Exact power-center model
- Converter model
- Mounting dimensions
- AC input
- DC output
- Cooling space
- Wire size
- Fuse ratings
- Battery-type support
The phrase “drop-in replacement” can be misleading. Similar-looking units may use different connectors, mounting points, or airflow paths.
A compatible converter-section upgrade makes sense when the rest of the power center is in good condition.
Replace the Complete Converter
Replace the complete converter if the old unit is damaged, unstable, underpowered, or unable to provide a suitable lithium charging profile.
A properly selected replacement can deliver:
- Faster shore-power charging
- Shorter generator runtime
- More predictable upper-stage charging
- Better monitor synchronization
- Higher useful output for a large battery bank
More amperage is not always better. The battery must accept the current, the wiring must carry it, and the AC circuit or generator must support the converter input.
Installing a 100A converter on wiring built for a 35A unit creates a new problem instead of solving the old one.
Do You Need a Lithium Compatible RV Converter?
A lithium compatible RV converter is often the cleanest long-term solution, but not every older system needs immediate replacement.
When the Old Converter Can Stay
Keeping the old converter may be reasonable when:
- Its output stays within the battery manufacturer’s approved range.
- It does not run an unsuitable high-voltage equalization cycle.
- Charging time fits the way you use the RV.
- Solar or a DC-DC charger handles most battery charging.
- The monitor has been calibrated correctly.
- Cable loss is low.
- The available battery capacity meets your needs.
This setup works best when fast shore-power or generator charging is not a priority.
When an Upgrade Makes Sense
An upgrade becomes practical after the tests show a repeatable limitation:
- Converter voltage stays near 13.2V–13.6V.
- The unit cannot enter or hold a suitable charging stage.
- Generator charging takes much longer than the calculated time.
- The battery repeatedly fails to meet valid full-charge conditions.
- Converter output is too low for the battery-bank size.
- Automatic battery detection selects the wrong profile.
- Voltage drops or fluctuates under normal load.
- The converter is noisy, overheating, or physically damaged.
The measured output matters more than the age or label on the converter.
What to Check Before Upgrading
Converter size must match the complete RV electrical system.
Converter Upgrade Checks
| Check | What to Confirm | Practical Reason |
|---|---|---|
| Battery-bank voltage | Usually 12V nominal in this type of RV system | Converter voltage must match the battery bank |
| Total capacity | Combined Ah of all parallel batteries | Larger banks require more time or charging current |
| Maximum charge current | Battery and BMS rating | Prevents exceeding the battery limit |
| Cable capacity | Gauge, length, insulation, and routing | Controls heat and voltage drop |
| Fuse and breaker ratings | Matched to the cable and circuit | Protects the wiring during a fault |
| AC supply | Shore-power circuit or generator capacity | Must support converter input demand |
| Average RV load | Continuous 12V use during charging | Reduces current available to the battery |
| Installation space | Dimensions and ventilation | Prevents fit and cooling problems |
Choose the converter from the lowest system limit. A 100A model offers little benefit if the BMS accepts only 50A, the generator cannot support it, or the cable path restricts current.
Conclusions
Use the test results to choose the next action.
- A wrong SOC reading calls for monitor calibration.
- A large voltage difference calls for cable or connection work.
- Low net current calls for reduced RV loads, more converter output, or both.
- A cold-temperature fault calls for battery warming before charging.
- A converter that cannot produce a suitable voltage calls for solar assistance, an external lithium charger, a replacement converter section, or a complete converter upgrade.
If shore power and generator charging are central to your RV use, a compatible converter usually gives the most predictable result. If solar already completes the charge and the old converter stays within the battery’s approved limits, replacement may offer little practical benefit.
Base the decision on measured voltage, current, temperature, and BMS status. The number on the screen is only one piece of the diagnosis.
Share